Key Features
- Workspace-level storage: Create storage that exists independently of any single application.
- Multi-app sharing: Mount the same storage volume to multiple applications within your workspace.
- CephFS-backed: Built on CephFS for reliable, distributed file storage with concurrent access support.
- Flexible allocation: Choose your storage quota from preset options (1 Gi, 5 Gi, 10 Gi, 25 Gi, 50 Gi) or specify a custom size.
Creating Shared Storage
Step 1: Navigate to Services
Go to your workspace in the Miget Dashboard and click on Services in the left sidebar. If you haven’t created any services yet, you’ll see an empty state with a prompt to create your first service.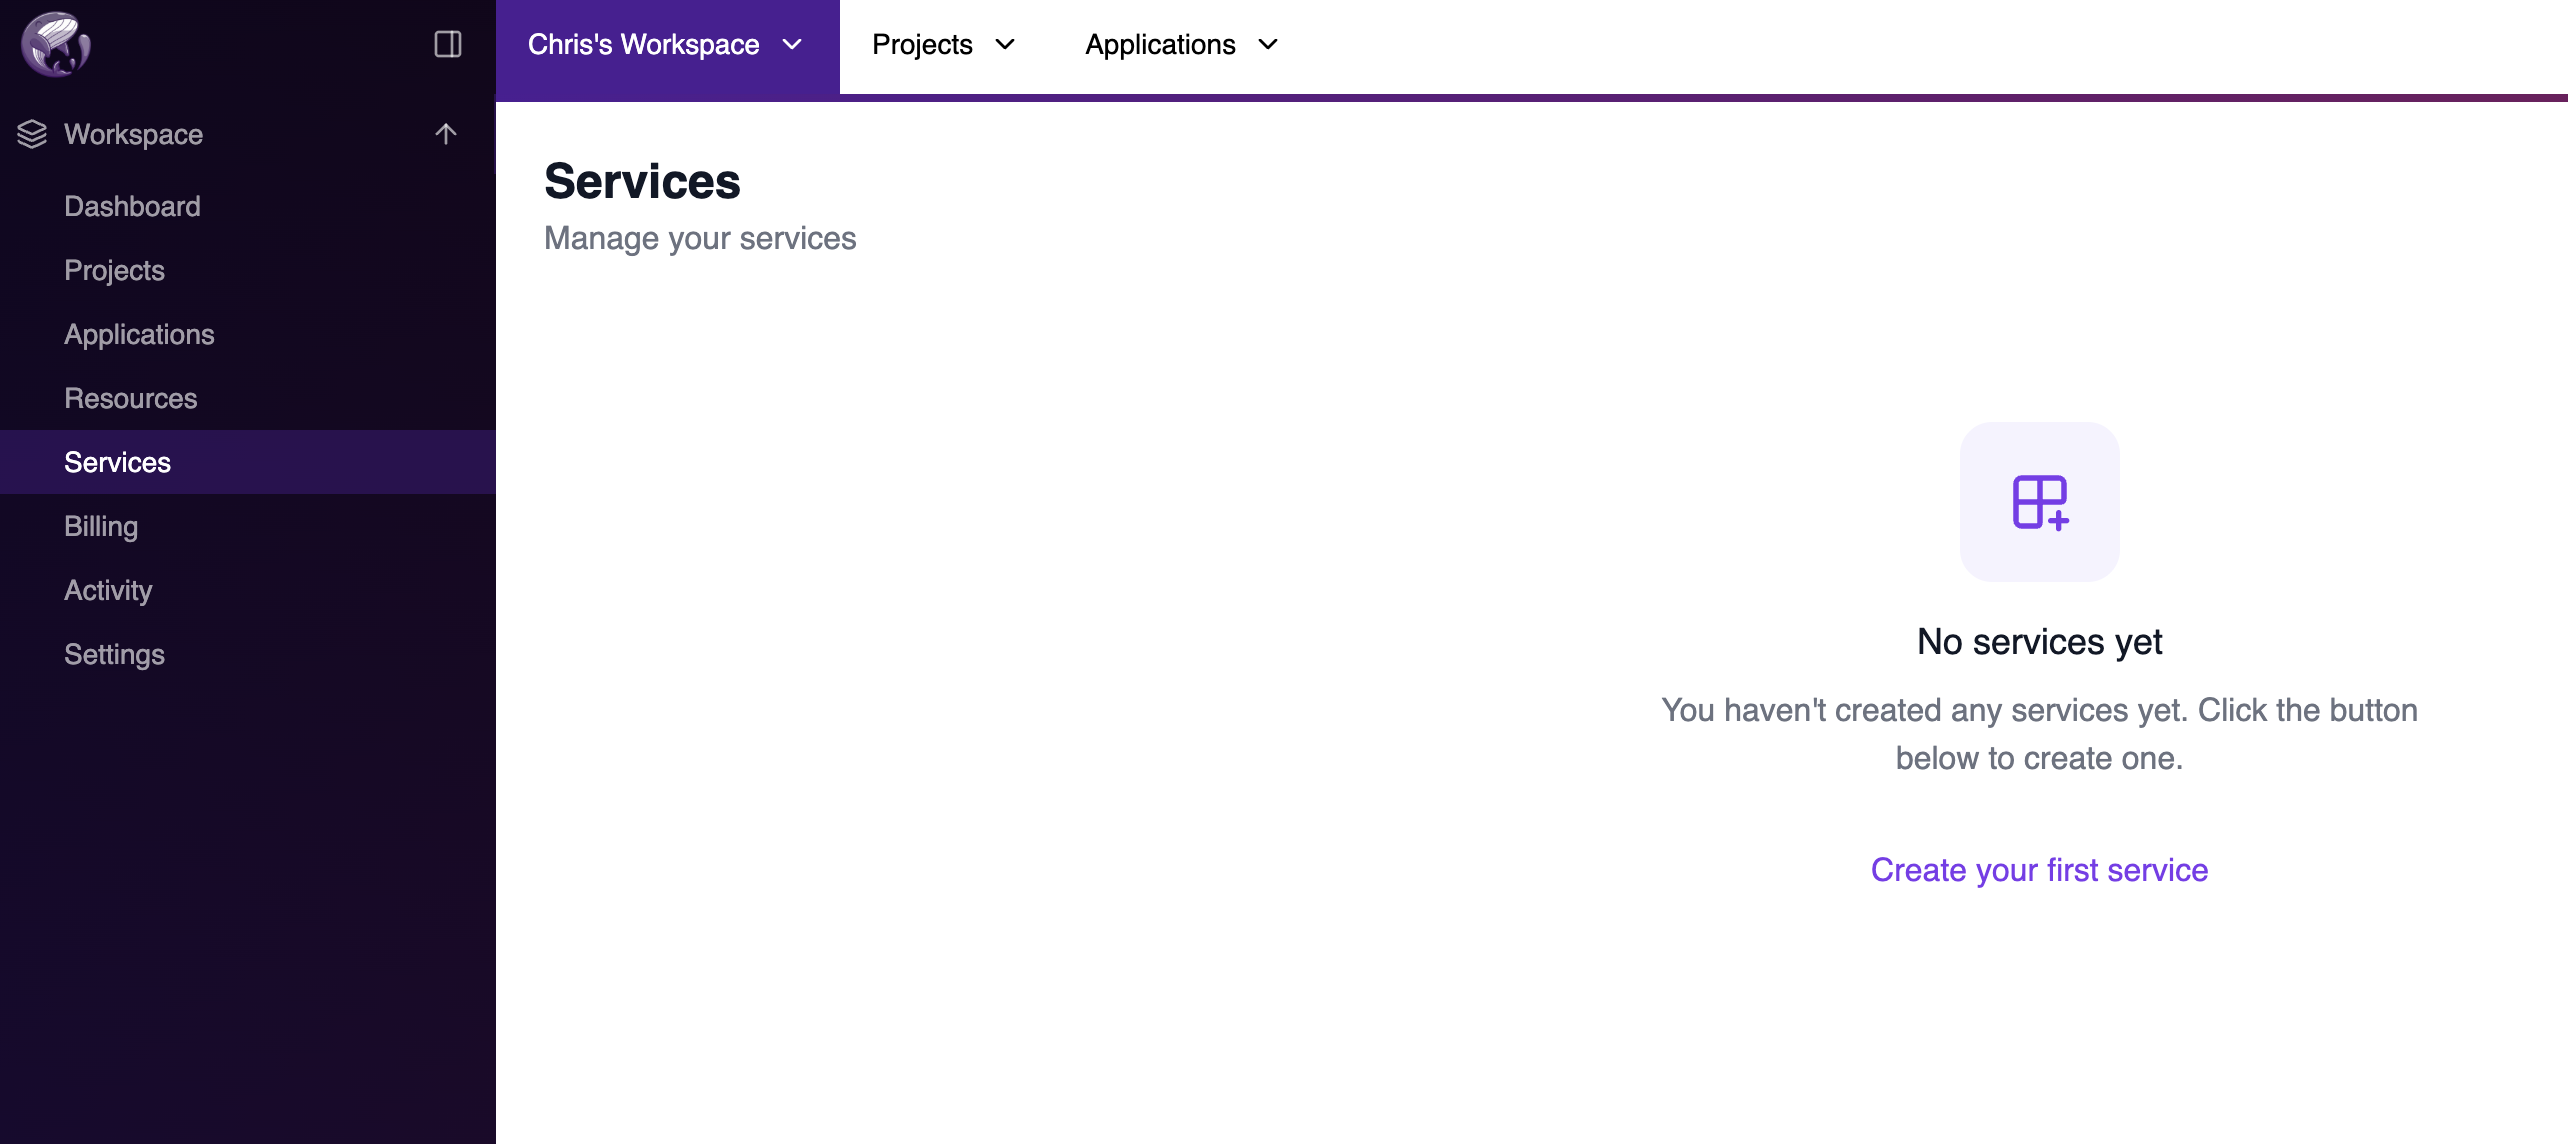
Step 2: Add a New Service
Click Create your first service (or + New if you already have services). You’ll see the available service types including PostgreSQL and Shared Storage.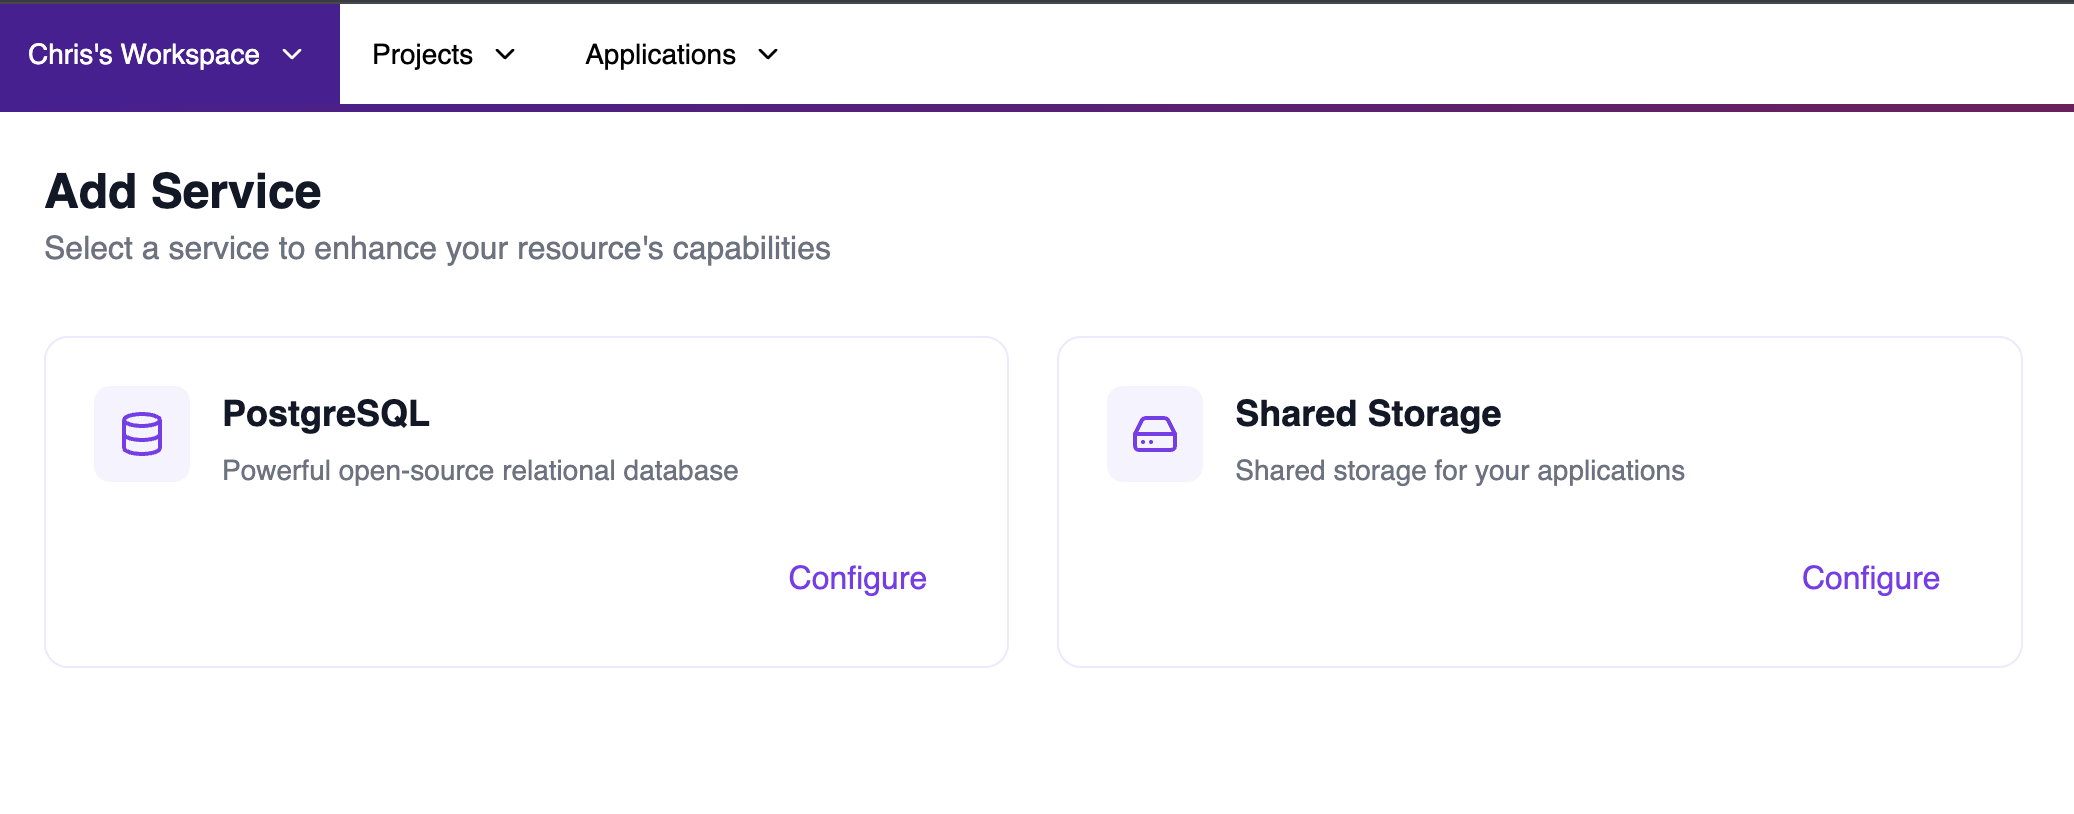
Step 3: Configure the Service
On the configuration page, you’ll need to provide:- Label: A custom name for your shared storage service (e.g., “Shared storage”).
- Project: Select the project where your service belongs.
- Resource: Choose the Miget compute resource where your service will be deployed. The panel shows available CPU, RAM, and storage for each resource.

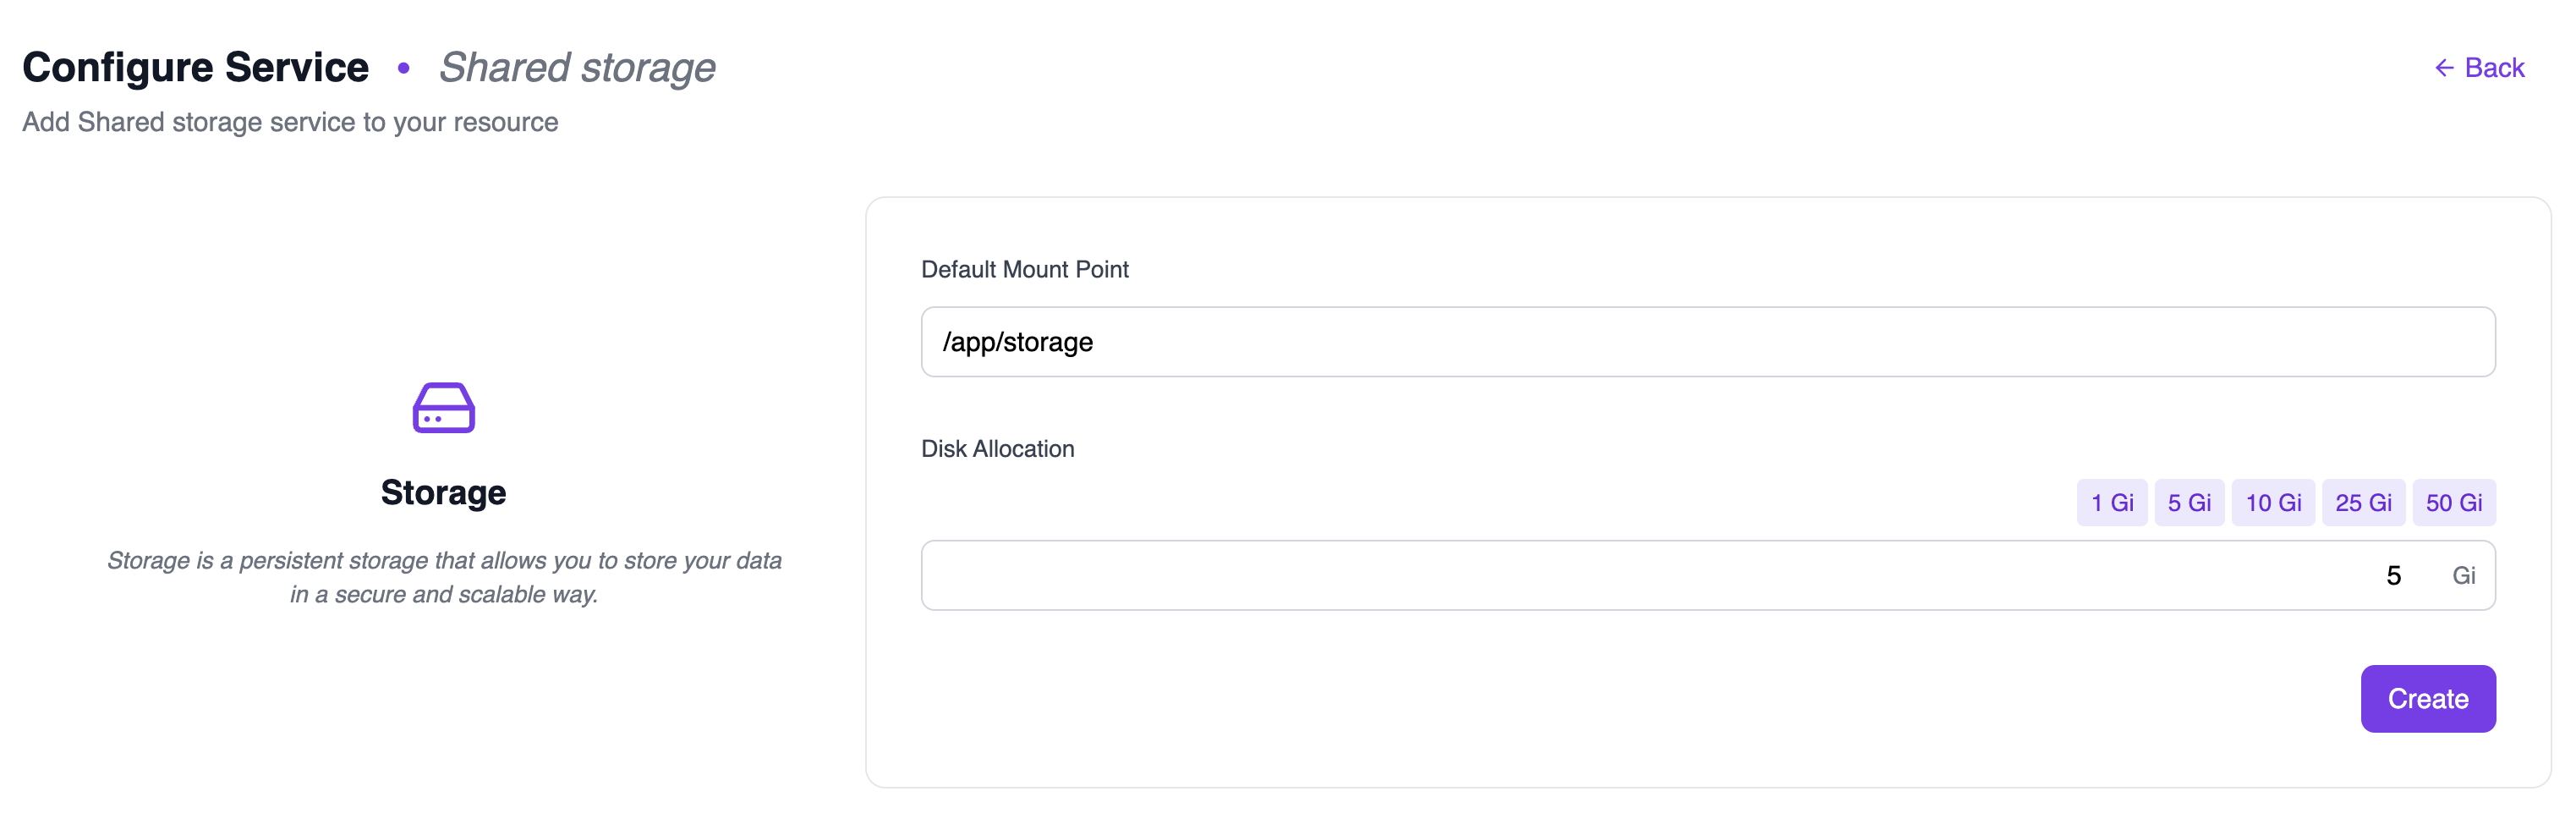
Step 4: Set Mount Point and Disk Allocation
Configure the storage settings:-
Default Mount Point: The path where the storage will be mounted in your applications (default:
/app/storage). - Disk Allocation: Select the storage size using the preset buttons (1 Gi, 5 Gi, 10 Gi, 25 Gi, 50 Gi) or enter a custom value.
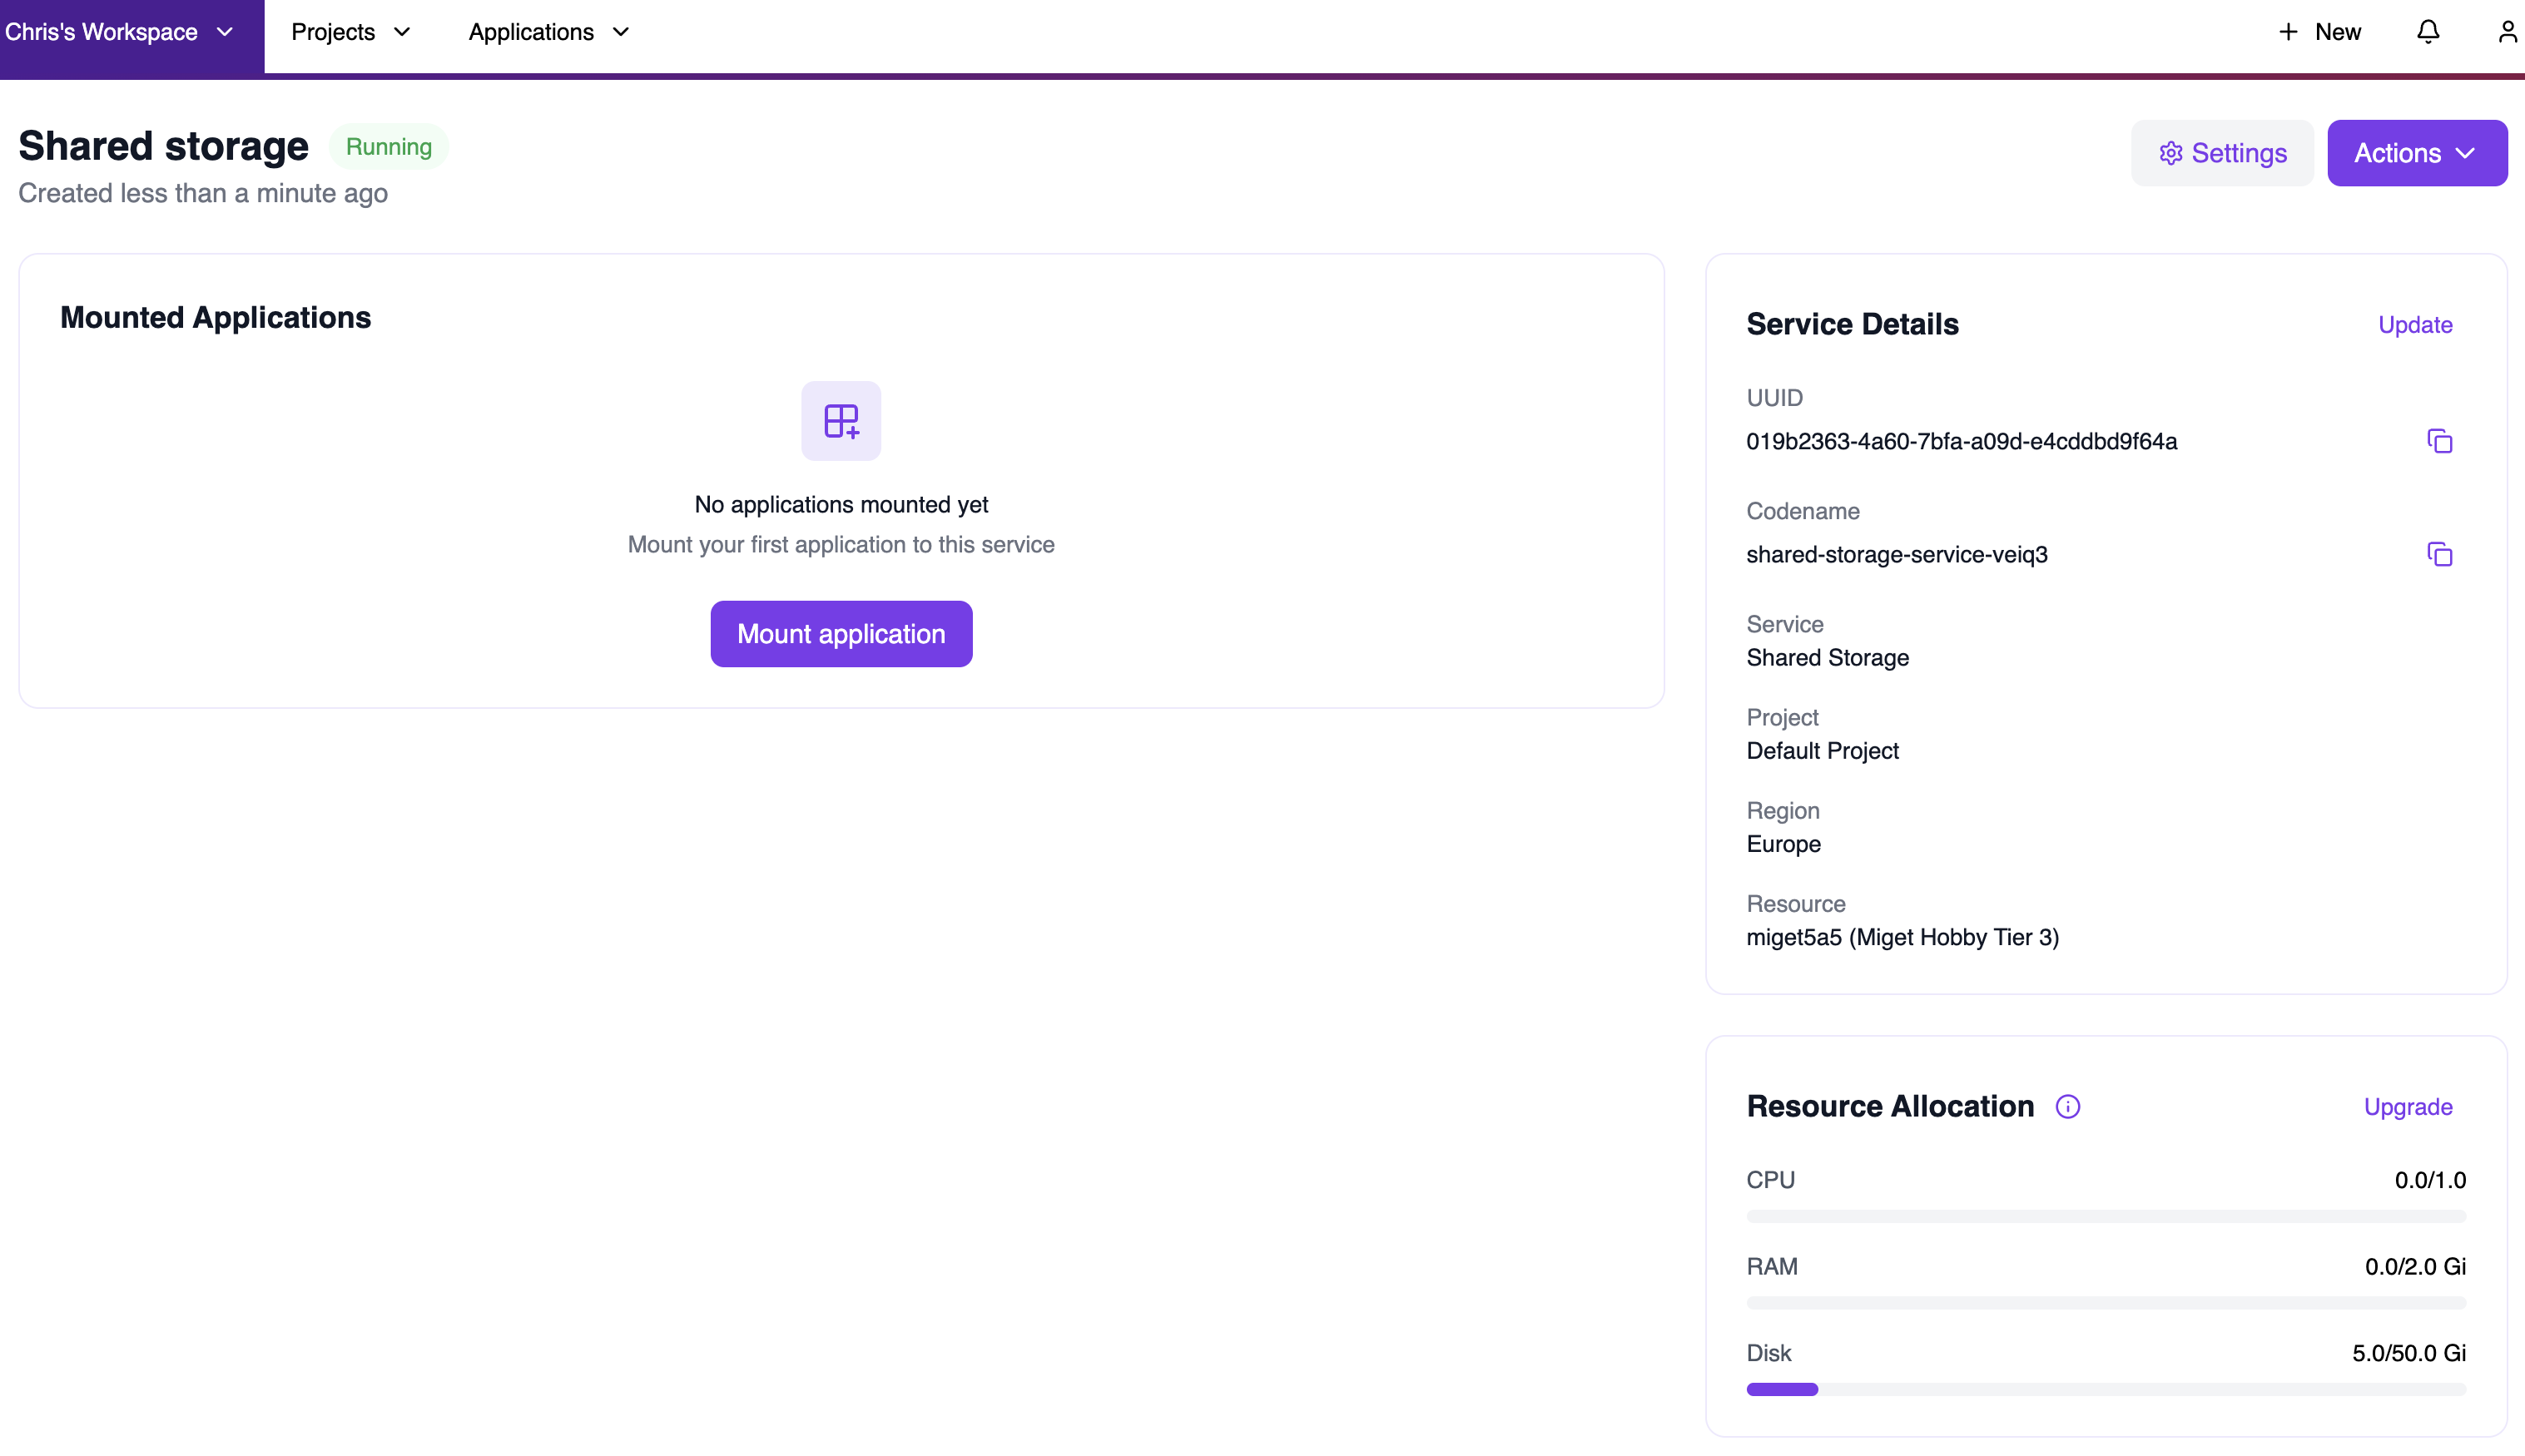
Step 5: View Your Shared Storage
Once created, you’ll be taken to the Shared Storage service view. Here you can see:- Service status: Shows “Running” when the storage is ready.
- Mounted Applications: Lists all applications currently using this storage.
- Service Details: UUID, codename, service type, project, region, and resource information.
- Resource Allocation: Shows the allocated disk space and usage.
Managing Shared Storage
After creating your shared storage, you can manage it from the Services page. This view shows all your services with their status, resource usage, and the number of mounted applications.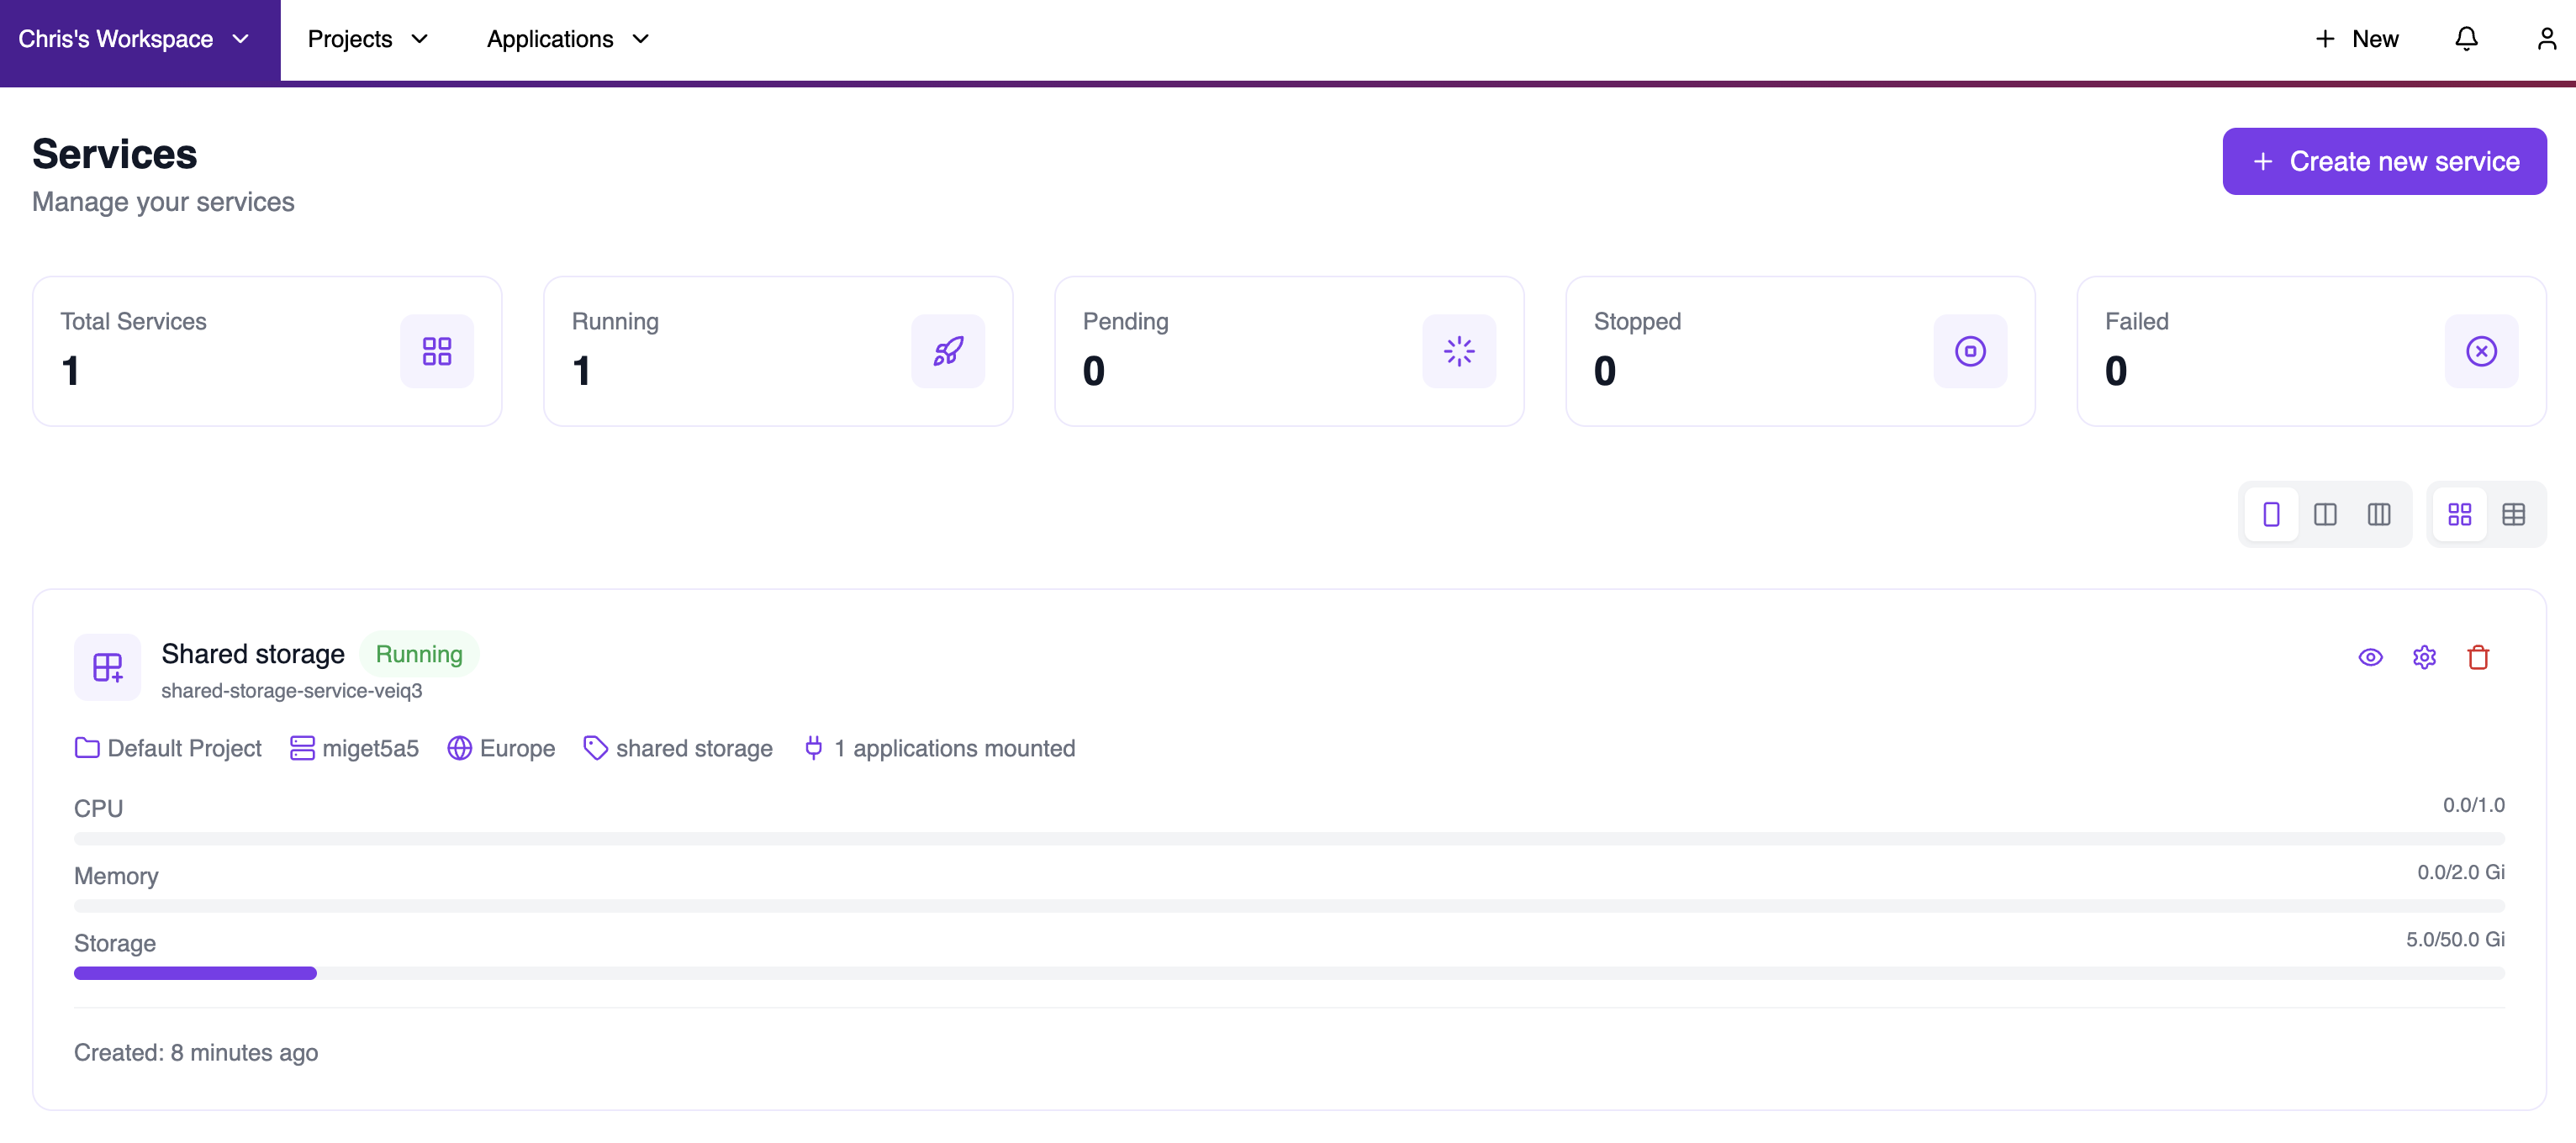
- Service status: Running, Pending, Stopped, or Failed.
- Resource details: Project, compute resource, region, and service type.
- Mounted applications count: Number of apps currently using this storage.
- Resource usage: CPU, Memory, and Storage consumption with progress bars.
Mounting Shared Storage to Applications
Once your shared storage is created, you can mount it to applications in two ways:Option 1: From the Service View
From the Shared Storage service page, click Mount application to attach the storage to an existing application. A dialog will appear where you can:- Select an application: Choose from the dropdown list of available applications in your workspace.
-
Set the mount path: Specify where the storage will be mounted inside the container (default:
/app/storage).
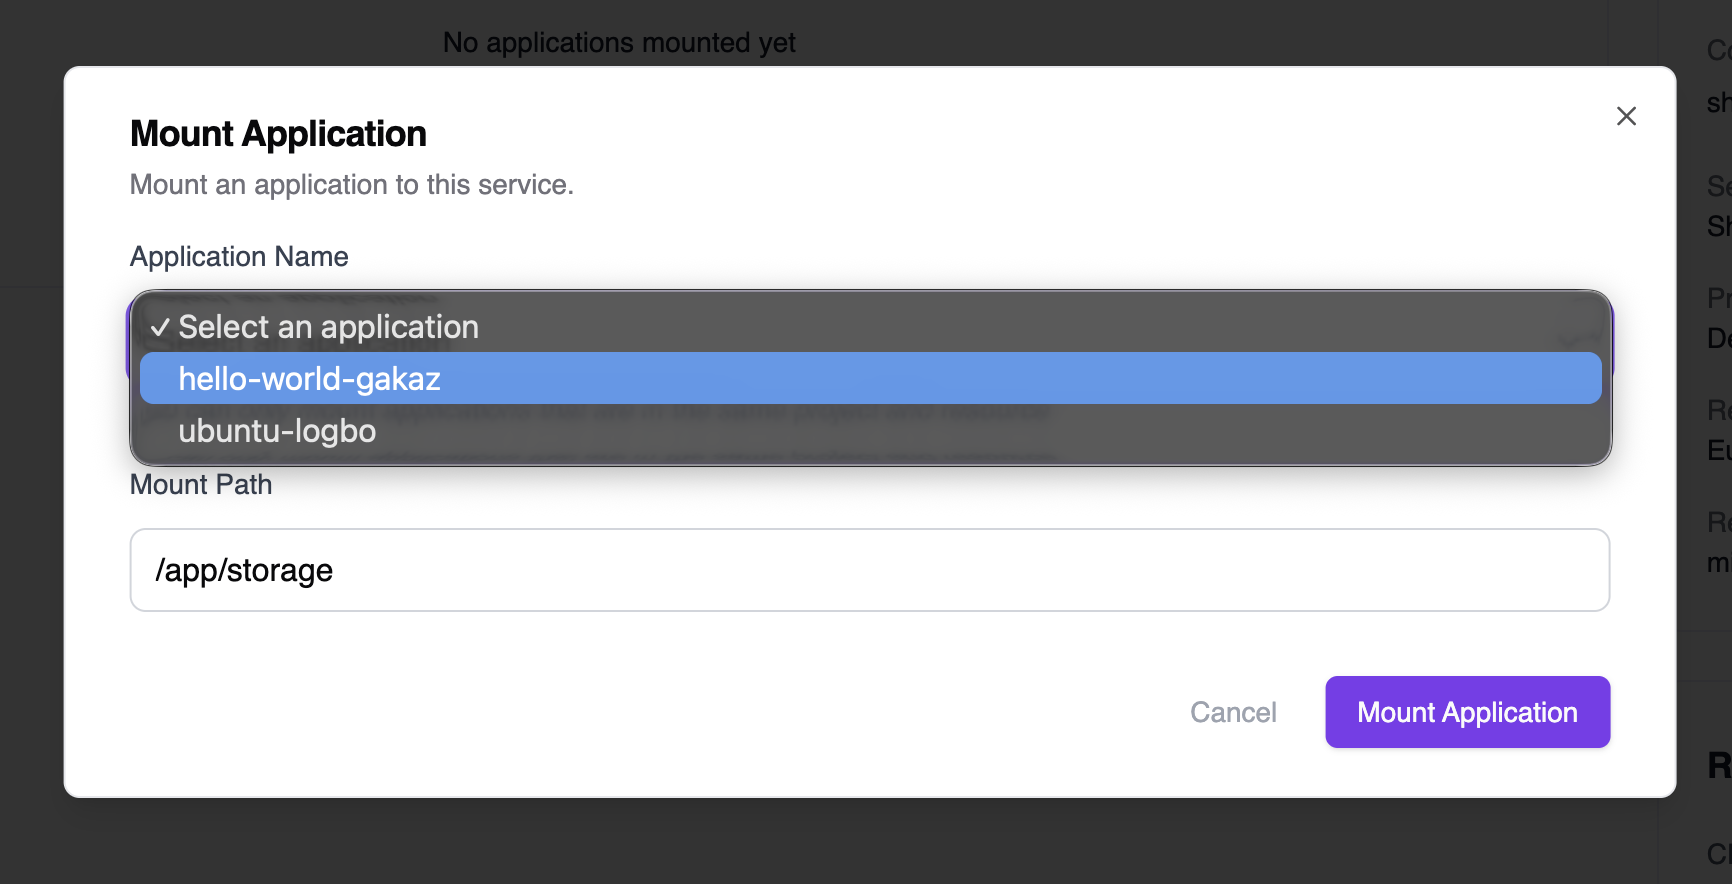
You can only mount to services that are in the same region and project as your shared storage.
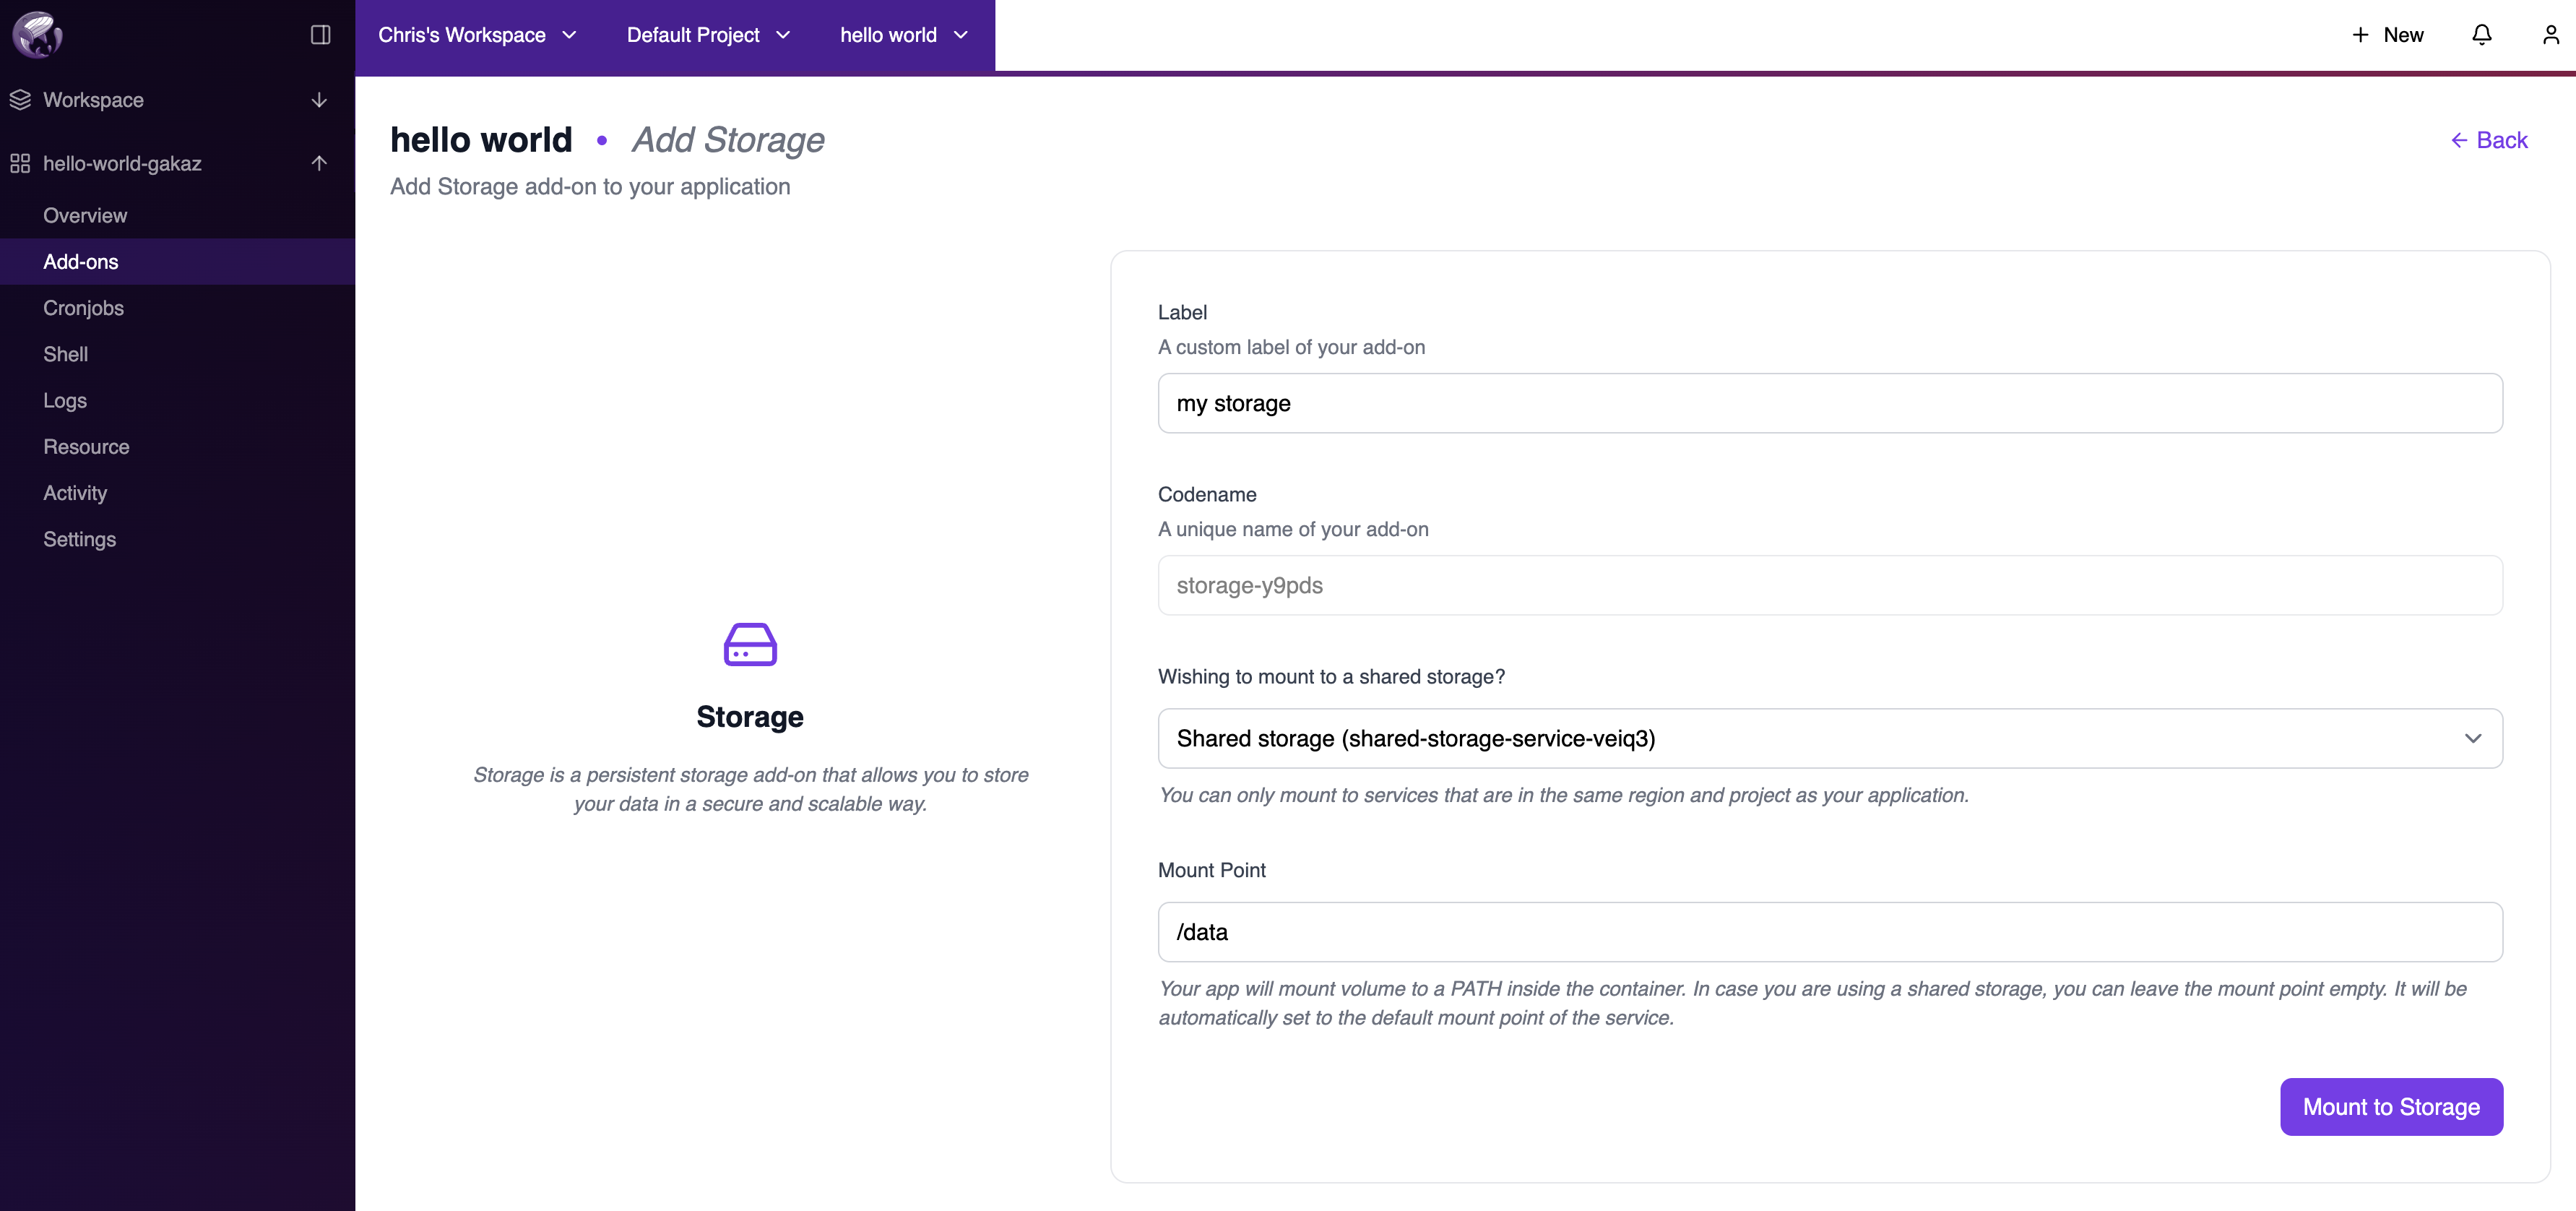
Option 2: As an Addon from the App
When configuring an application, go to Add-ons → Add more and select Storage. On the Add Storage page:- Label: A custom label for your add-on.
- Codename: A unique name automatically generated for the add-on.
- Wishing to mount to a shared storage?: Select your existing shared storage from the dropdown.
-
Mount Point: Specify the path where the storage will be mounted (e.g.,
/data). If left empty when using shared storage, it defaults to the service’s default mount point.
Viewing Mounted Storage
You can view mounted shared storage from multiple places:From the App View
Navigate to your application and scroll to the Add-ons section. You’ll see the mounted shared storage listed with its label, type, and status.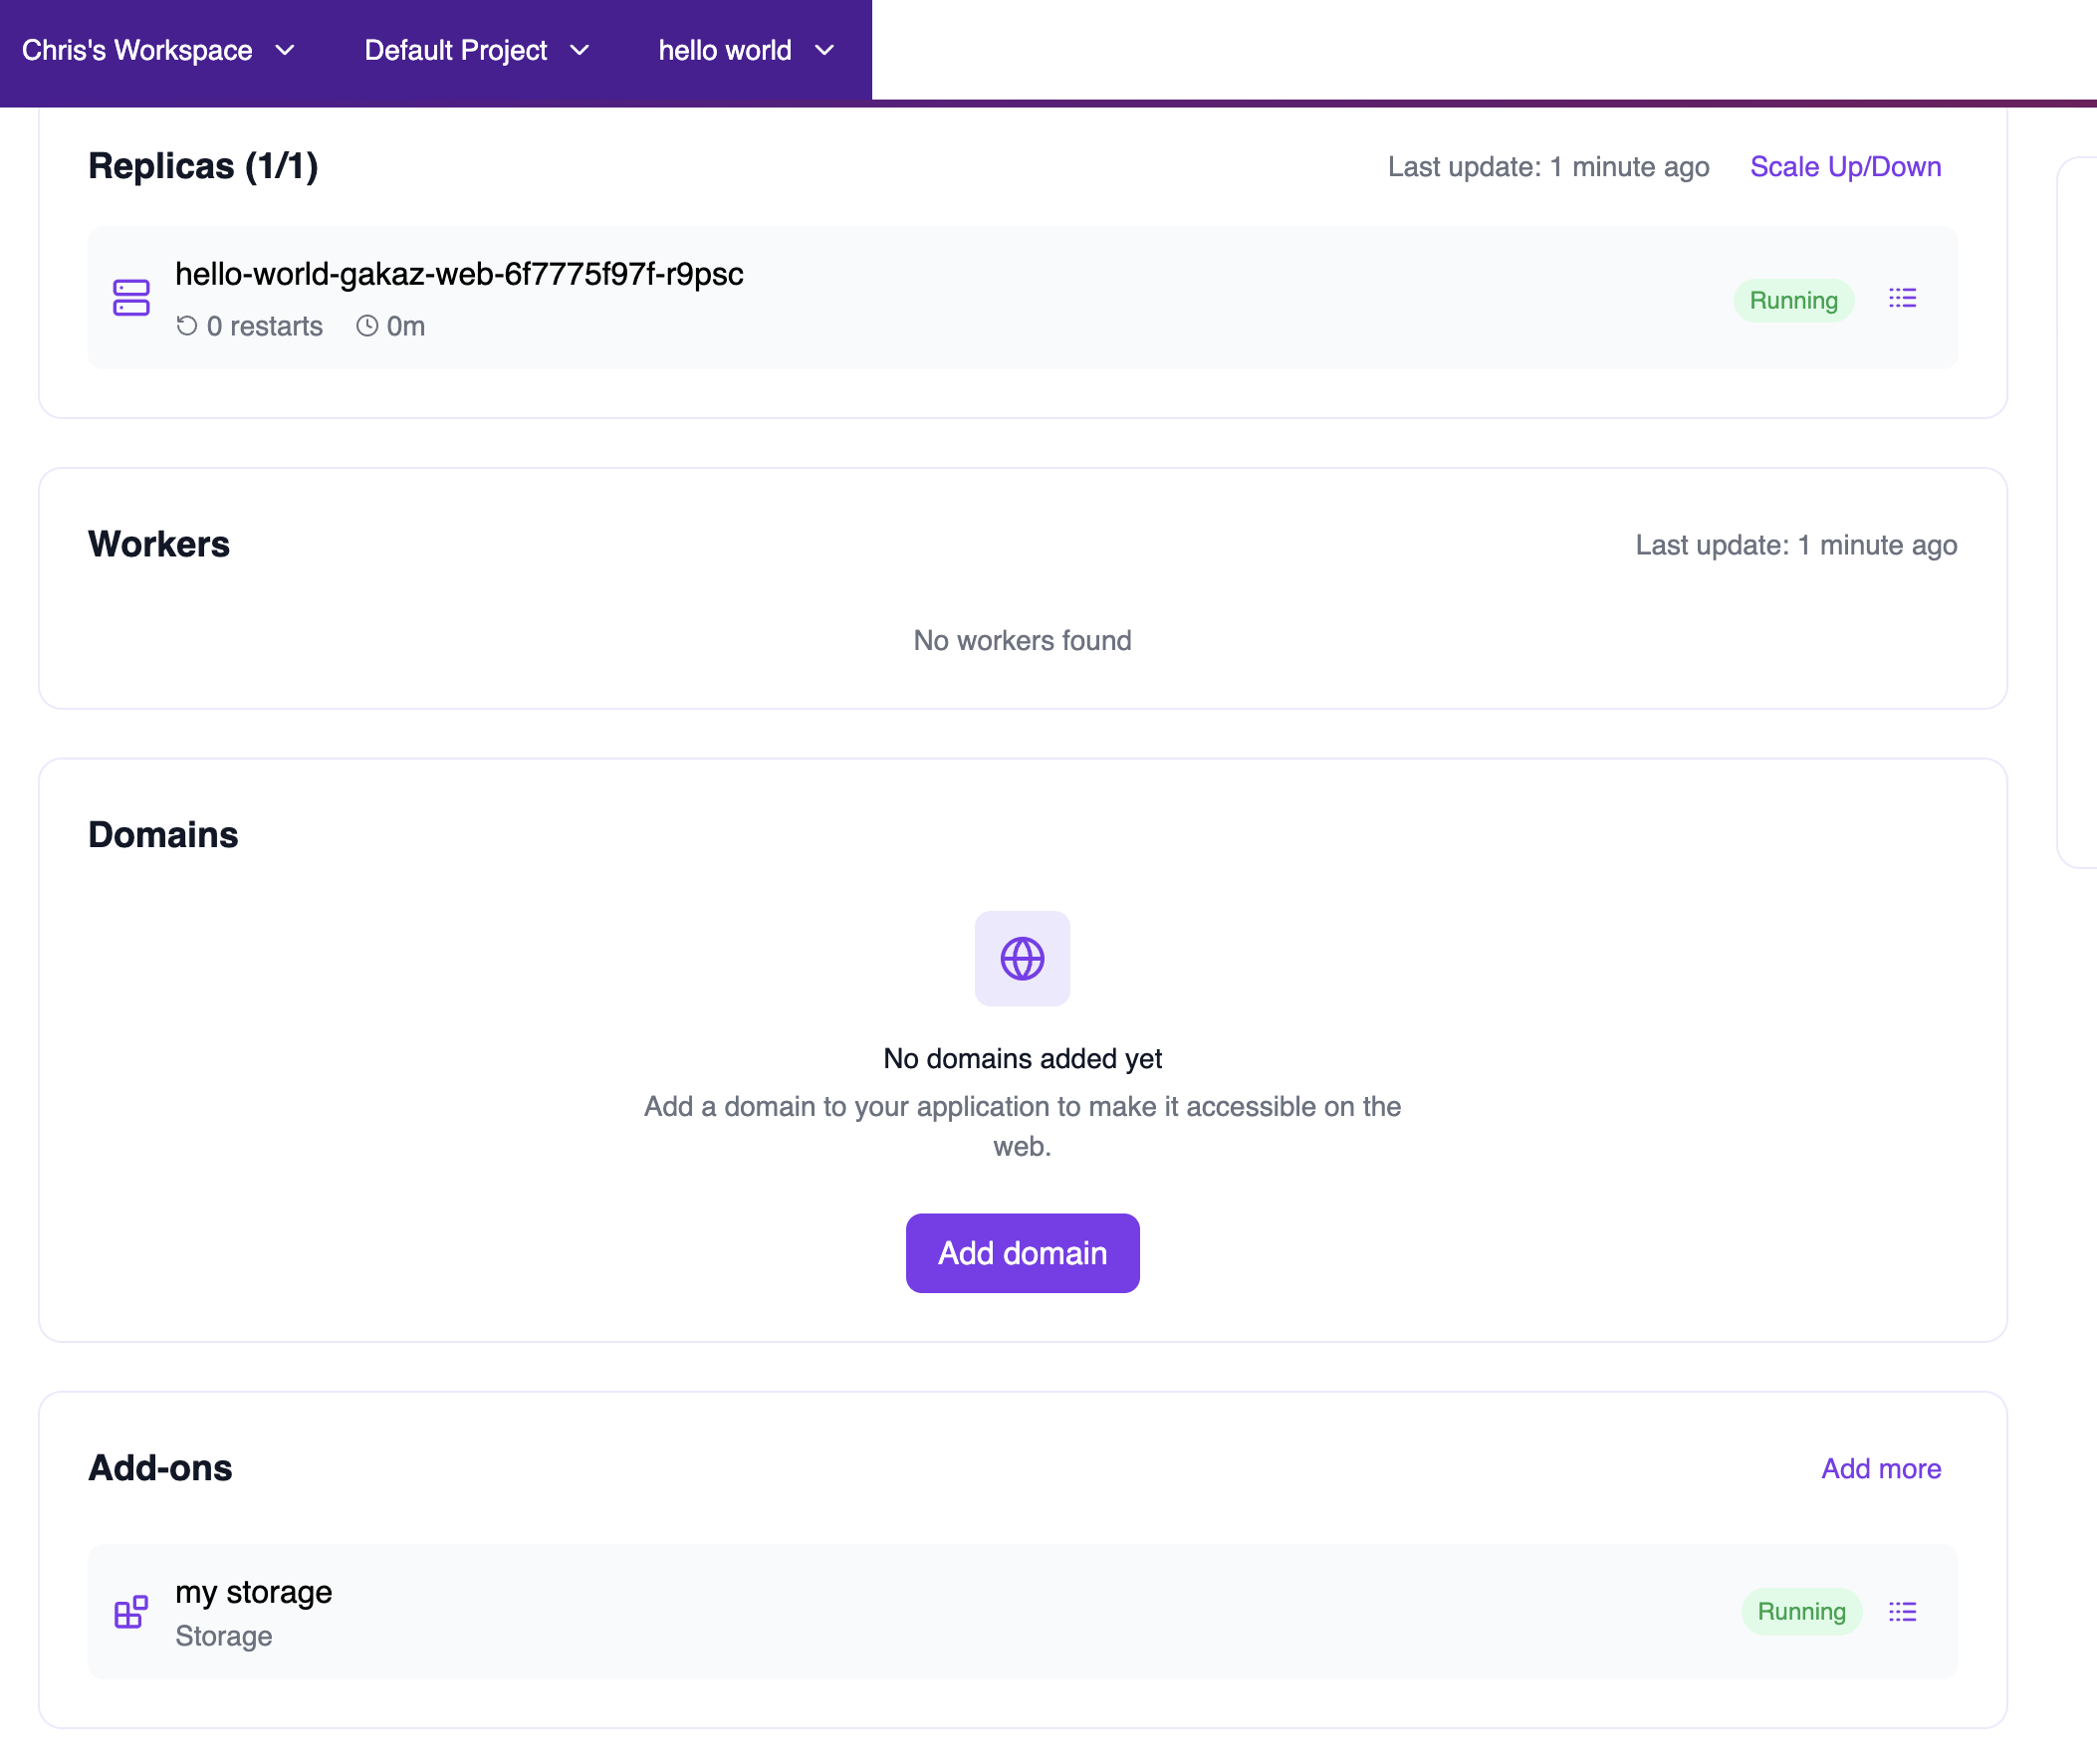
From the Service View
The Shared Storage service page displays all applications that have mounted this storage, along with the allocated quota and resource usage.Use Cases
Shared Storage is ideal for:- Shared file uploads: Multiple application instances or services accessing the same uploaded files.
- Static assets: Serving common assets across multiple frontend applications.
- Data processing pipelines: Multiple workers reading from and writing to a shared data directory.
- Content management: CMS platforms where multiple services need access to media files.