Prerequisites
- A Miget account with a Workspace
- A GitHub account with access to the repositories you want to deploy
Install the GitHub App
Open Git Credentials
Navigate to your Workspace Settings and select the Git Credentials tab. Click Connect GitHub to begin the installation.
Install Miget.com on GitHub
You are redirected to GitHub to install the Miget.com App. Choose where to install it:
Select repositories and permissions
Choose which repositories Miget can access: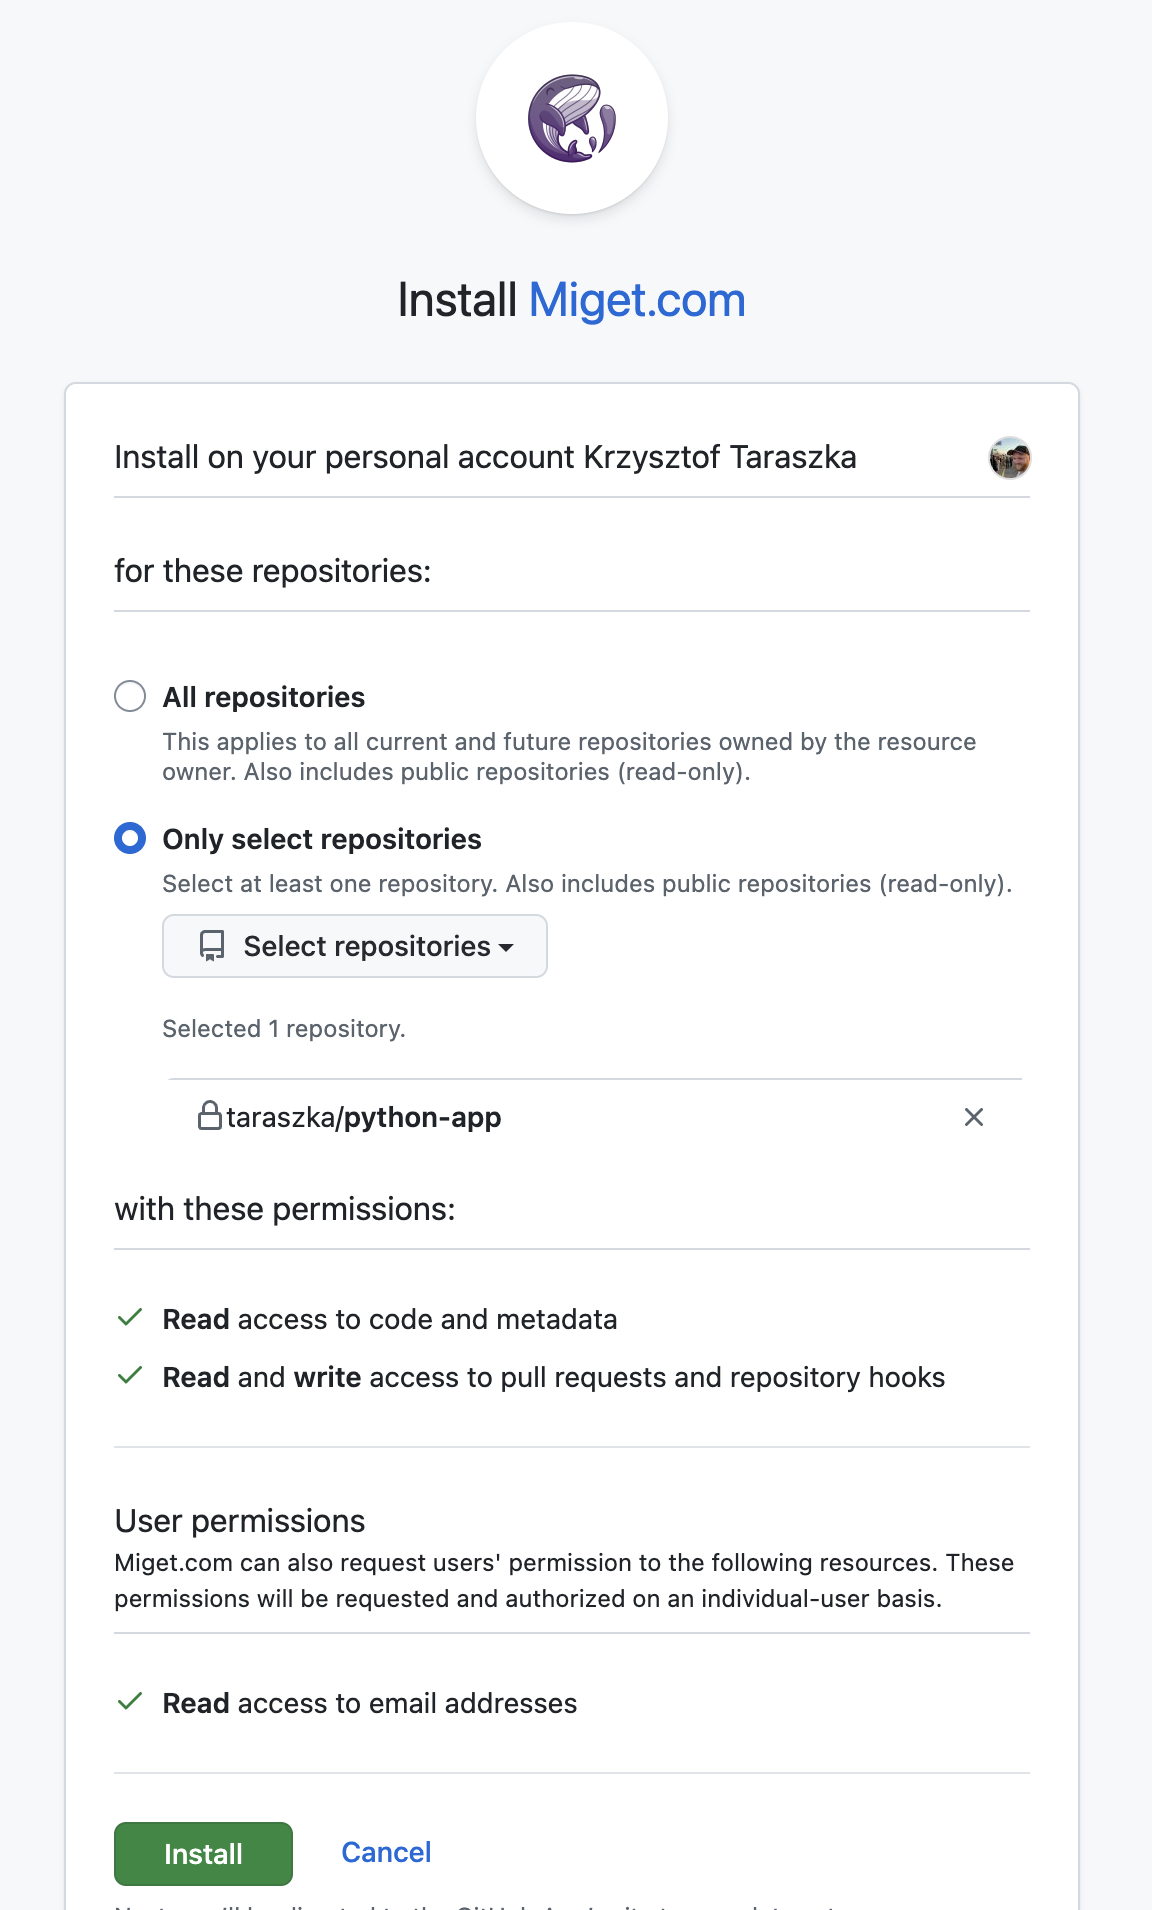 The GitHub App requests:
- All repositories - grants access to all current and future repositories
- Only select repositories - pick specific repositories to connect
- Read access to code and metadata
- Read and write access to pull requests and repository hooks
Deploy from GitHub
Once the GitHub App is installed, you can deploy from GitHub when creating a new application or changing an existing app’s deployment source.Select GitHub as the source
In the New Application wizard, select the GitHub source type. Your connected repositories appear in a searchable list. Select the repository you want to deploy.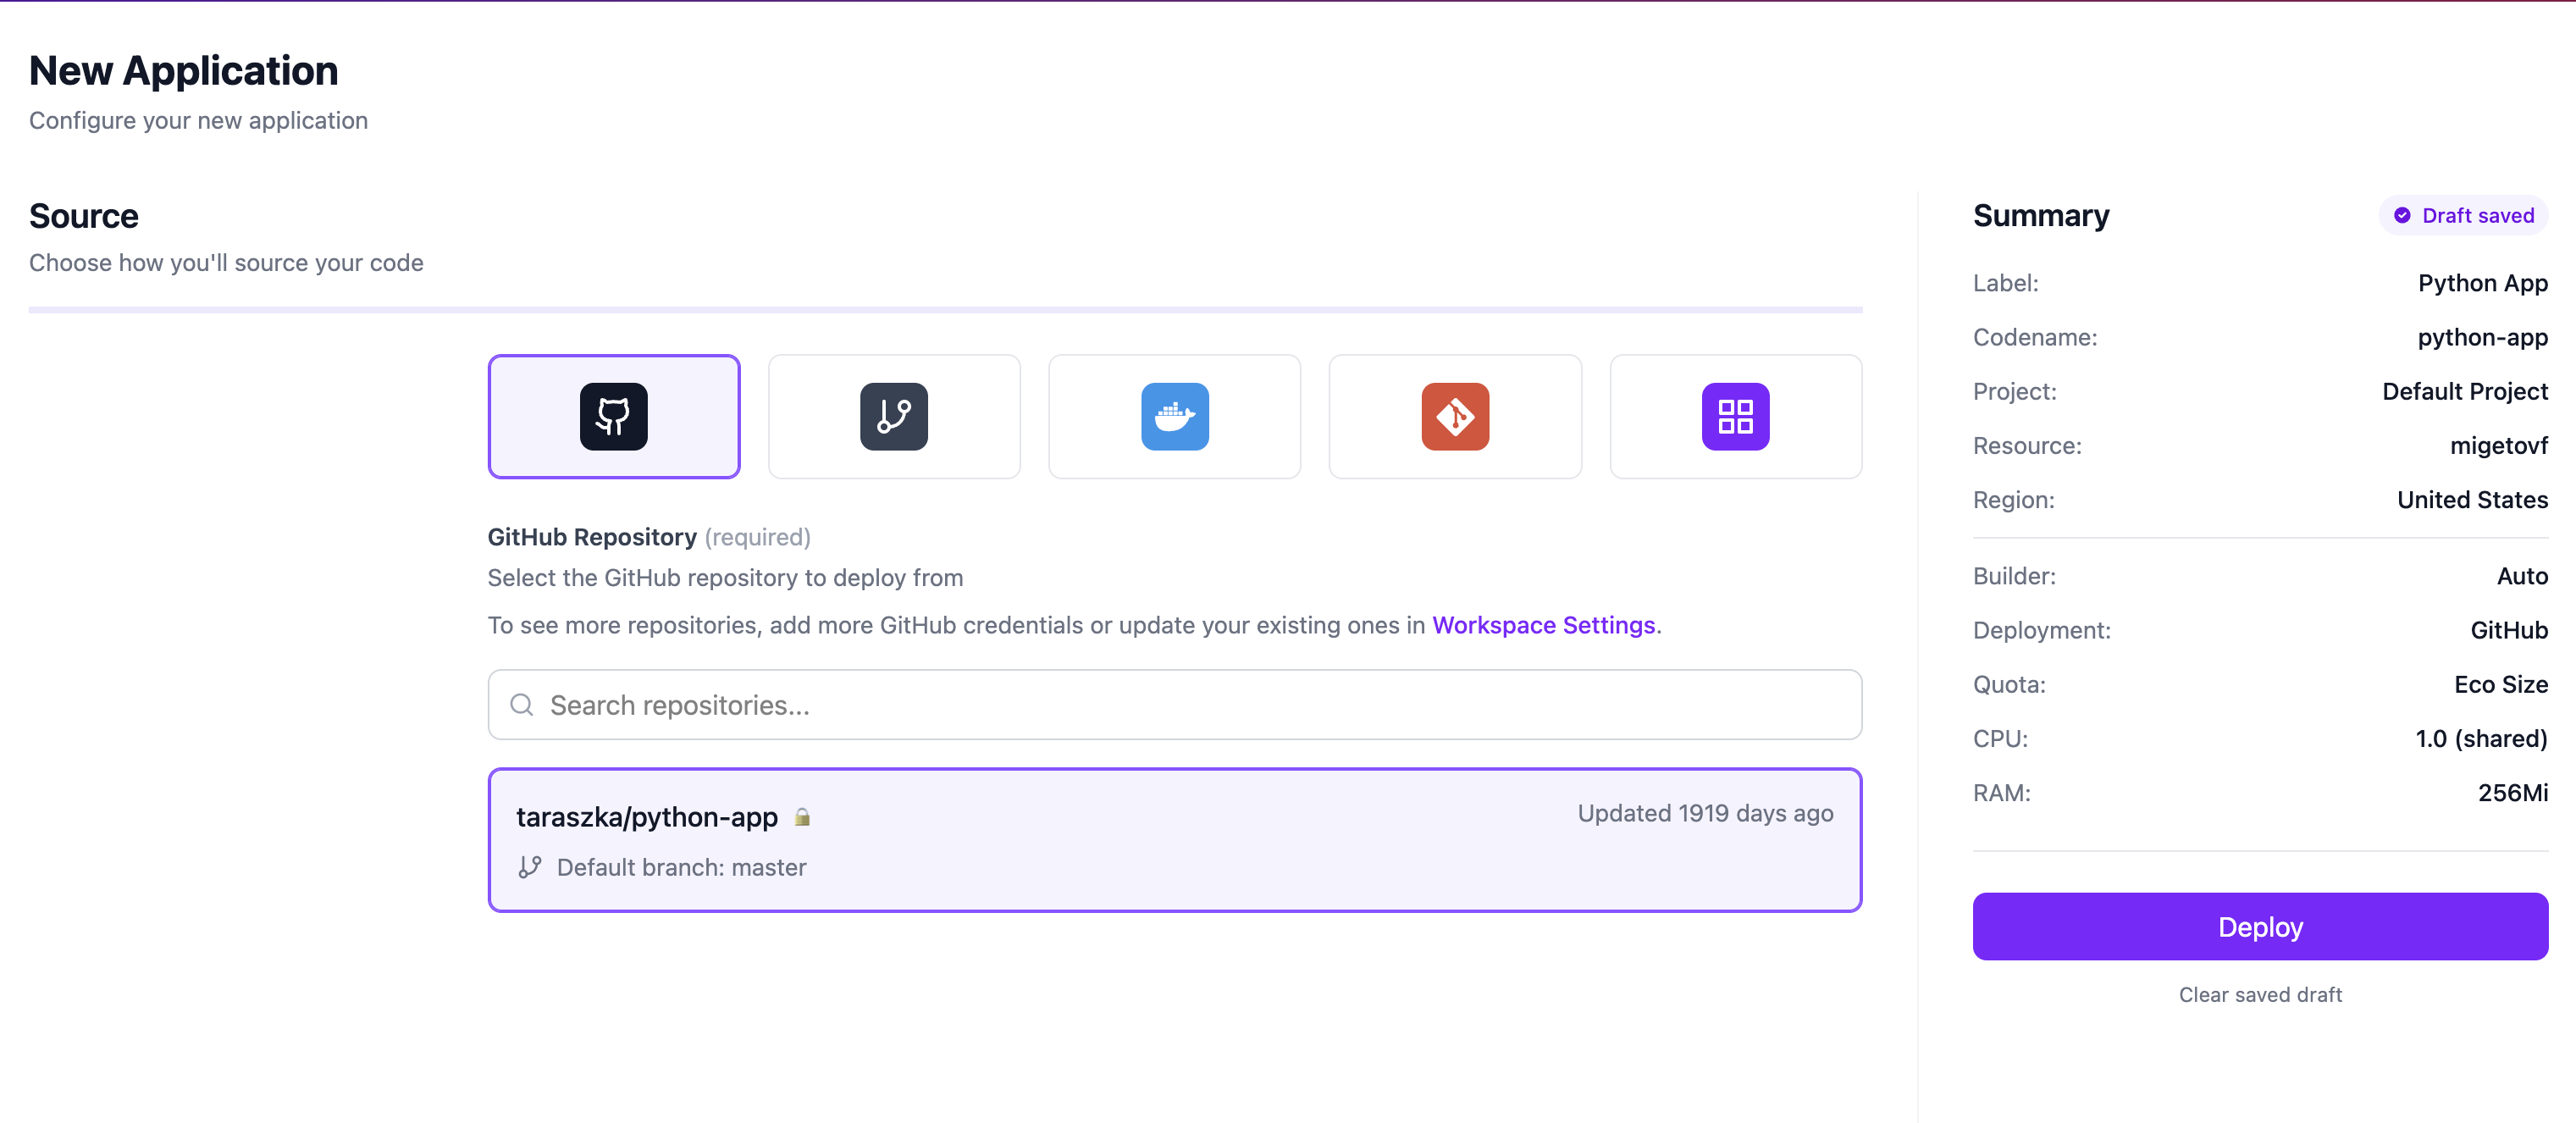
If you don’t see your repository, add more GitHub credentials or update your existing ones in Workspace Settings.
Preview Environments
Preview Environments automatically create live application instances for every pull request, letting your team preview changes before merging. Each preview environment is a full clone of your application with its own URL.Enabling Preview Environments
- Open your application in the Miget dashboard
- Go to Settings and find the Preview Environments section
- Enable preview environments and configure the trigger mode
Trigger Modes
Choose when preview environments are created:| Mode | Behavior |
|---|---|
| Auto | A preview environment is created for every pull request automatically |
| Label | A preview environment is created only when the review-app label is added to the PR |
| Branch pattern | A preview environment is created for PRs from branches matching a pattern (e.g., feature/*) |
Cleanup Policies
Configure how preview environments are removed when they are no longer needed:- Immediate - the preview environment is deleted as soon as the PR is closed or merged
- Retention days - the preview environment is kept for a specified number of days after the PR is closed
- Inactivity - the preview environment is deleted after a period of inactivity
PR Status Comments
When a preview environment is deployed, Miget automatically posts a comment on the GitHub pull request with:- The deployment status (building, deployed, failed)
- A direct link to the preview environment URL
Next Steps
Build Methods
Configure how your application is built
Environment Variables
Set secrets and configuration for your deployments