Why Use Container Registry Deployment?
- Custom CI/CD pipelines — Build images using GitHub Actions, GitLab CI, Jenkins, or any other CI system
- Pre-built images — Deploy existing images from Docker Hub, GitHub Container Registry, or private registries
- Build optimization — Use specialized build tools, caching strategies, or multi-stage builds in your own environment
- Compliance requirements — Meet security or audit requirements that mandate builds in specific environments
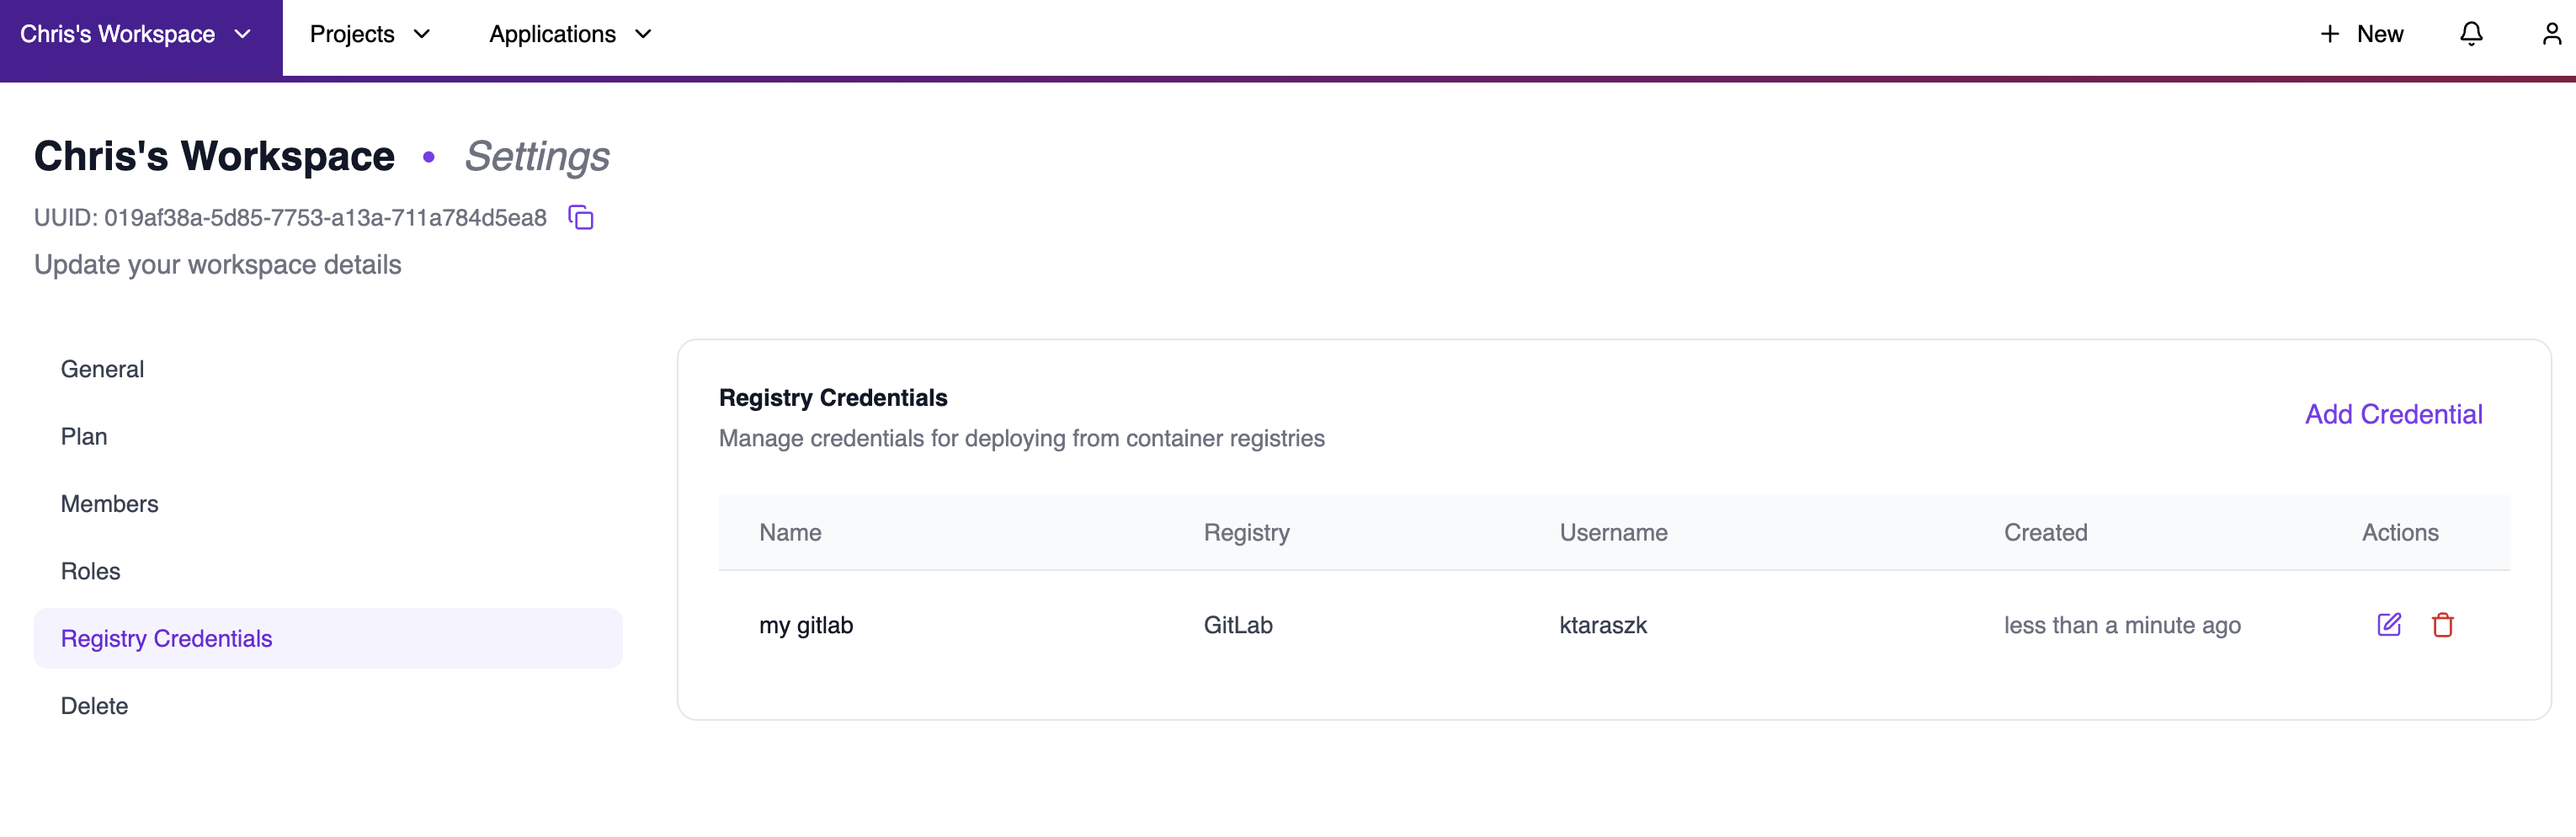
Setting Up Registry Credentials
Before deploying from a private registry, you need to add your registry credentials to your workspace.Adding Credentials
- Navigate to Workspace Settings → Registry Credentials
- Click Add Credential
- Select your registry provider:
- Docker Hub
- GitHub
- GitLab
- AWS Elastic (ECR)
- Azure
- DigitalOcean
- Quay.io
- Generic Docker Registry
- Enter a name for the credential (e.g.,
my-docker-hub) - Provide your username and Personal Access Token / Password
- Click Add Credential
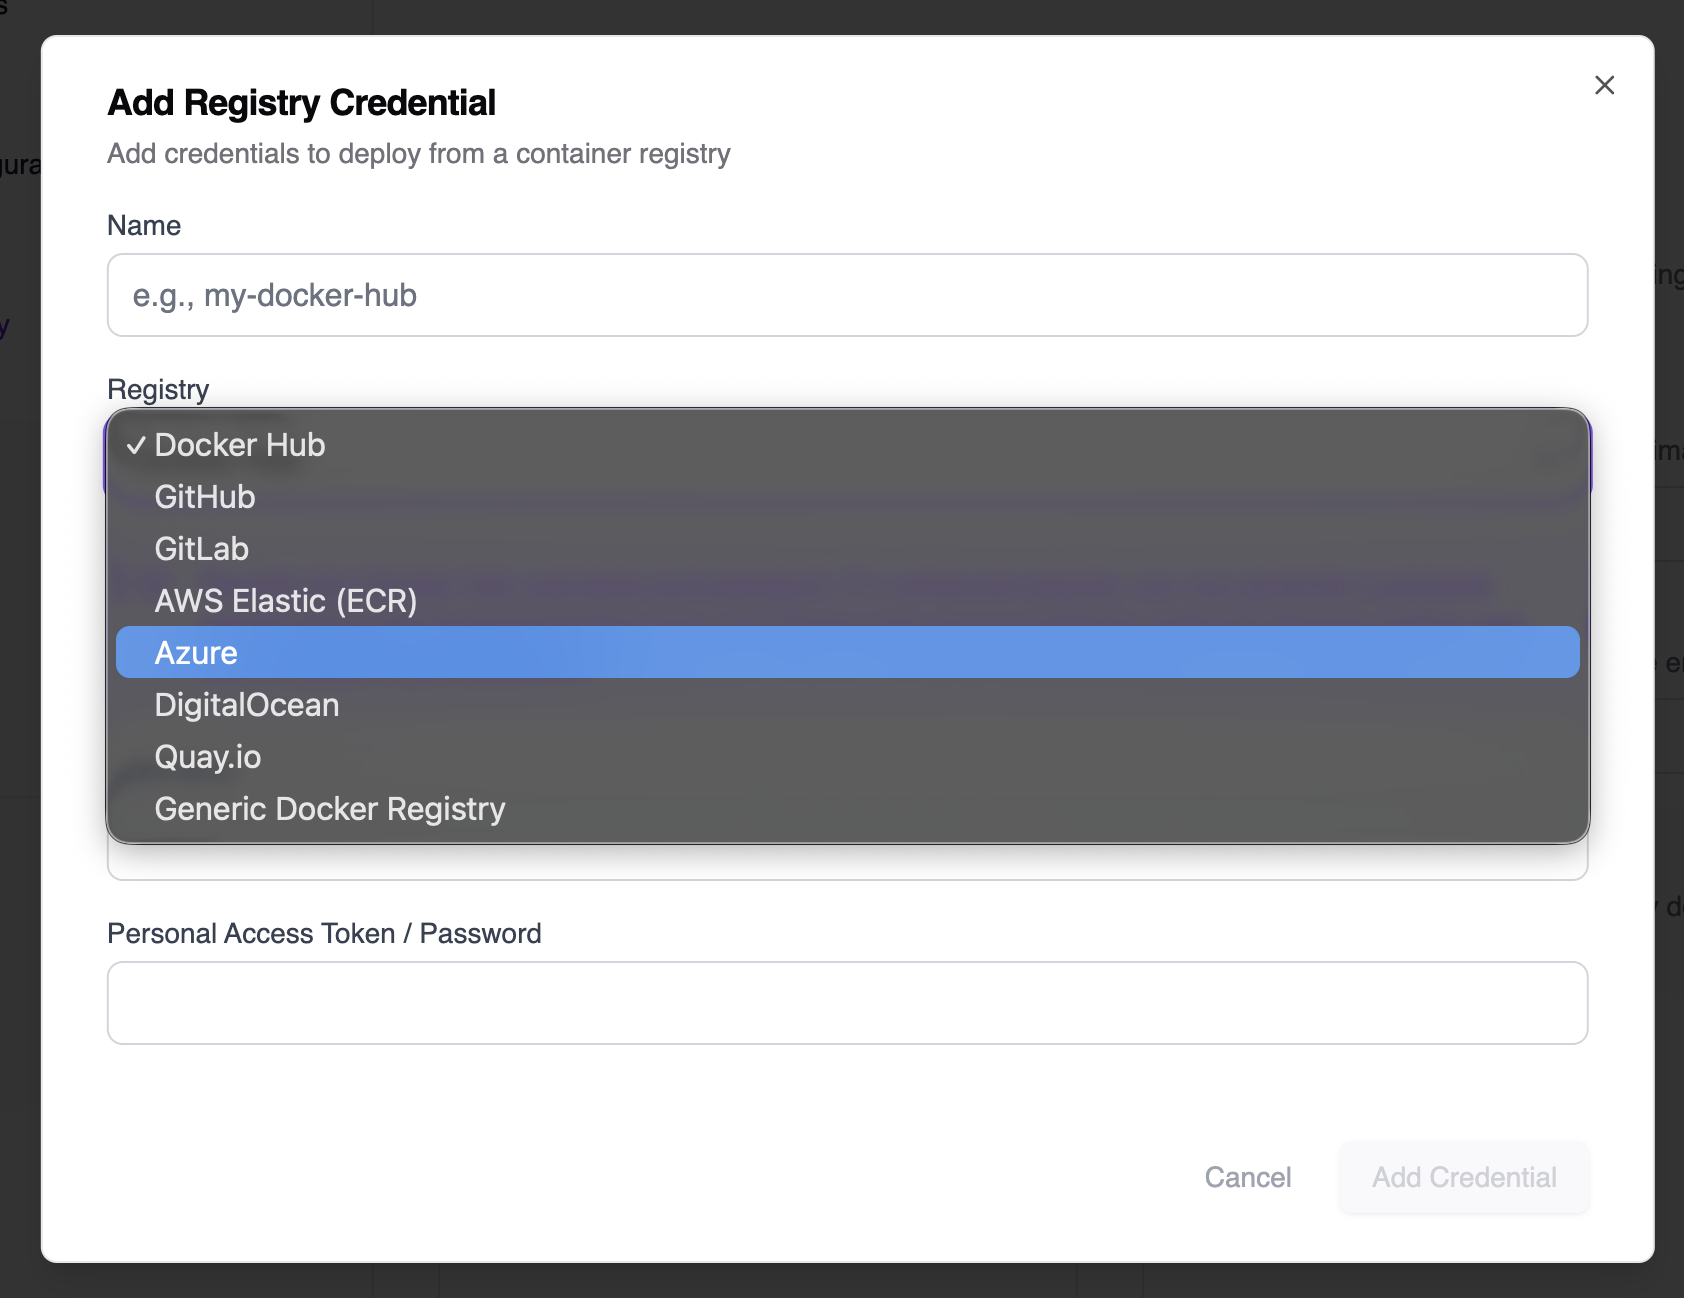
For security, create a read-only access token. Miget only needs to pull images, not push them.
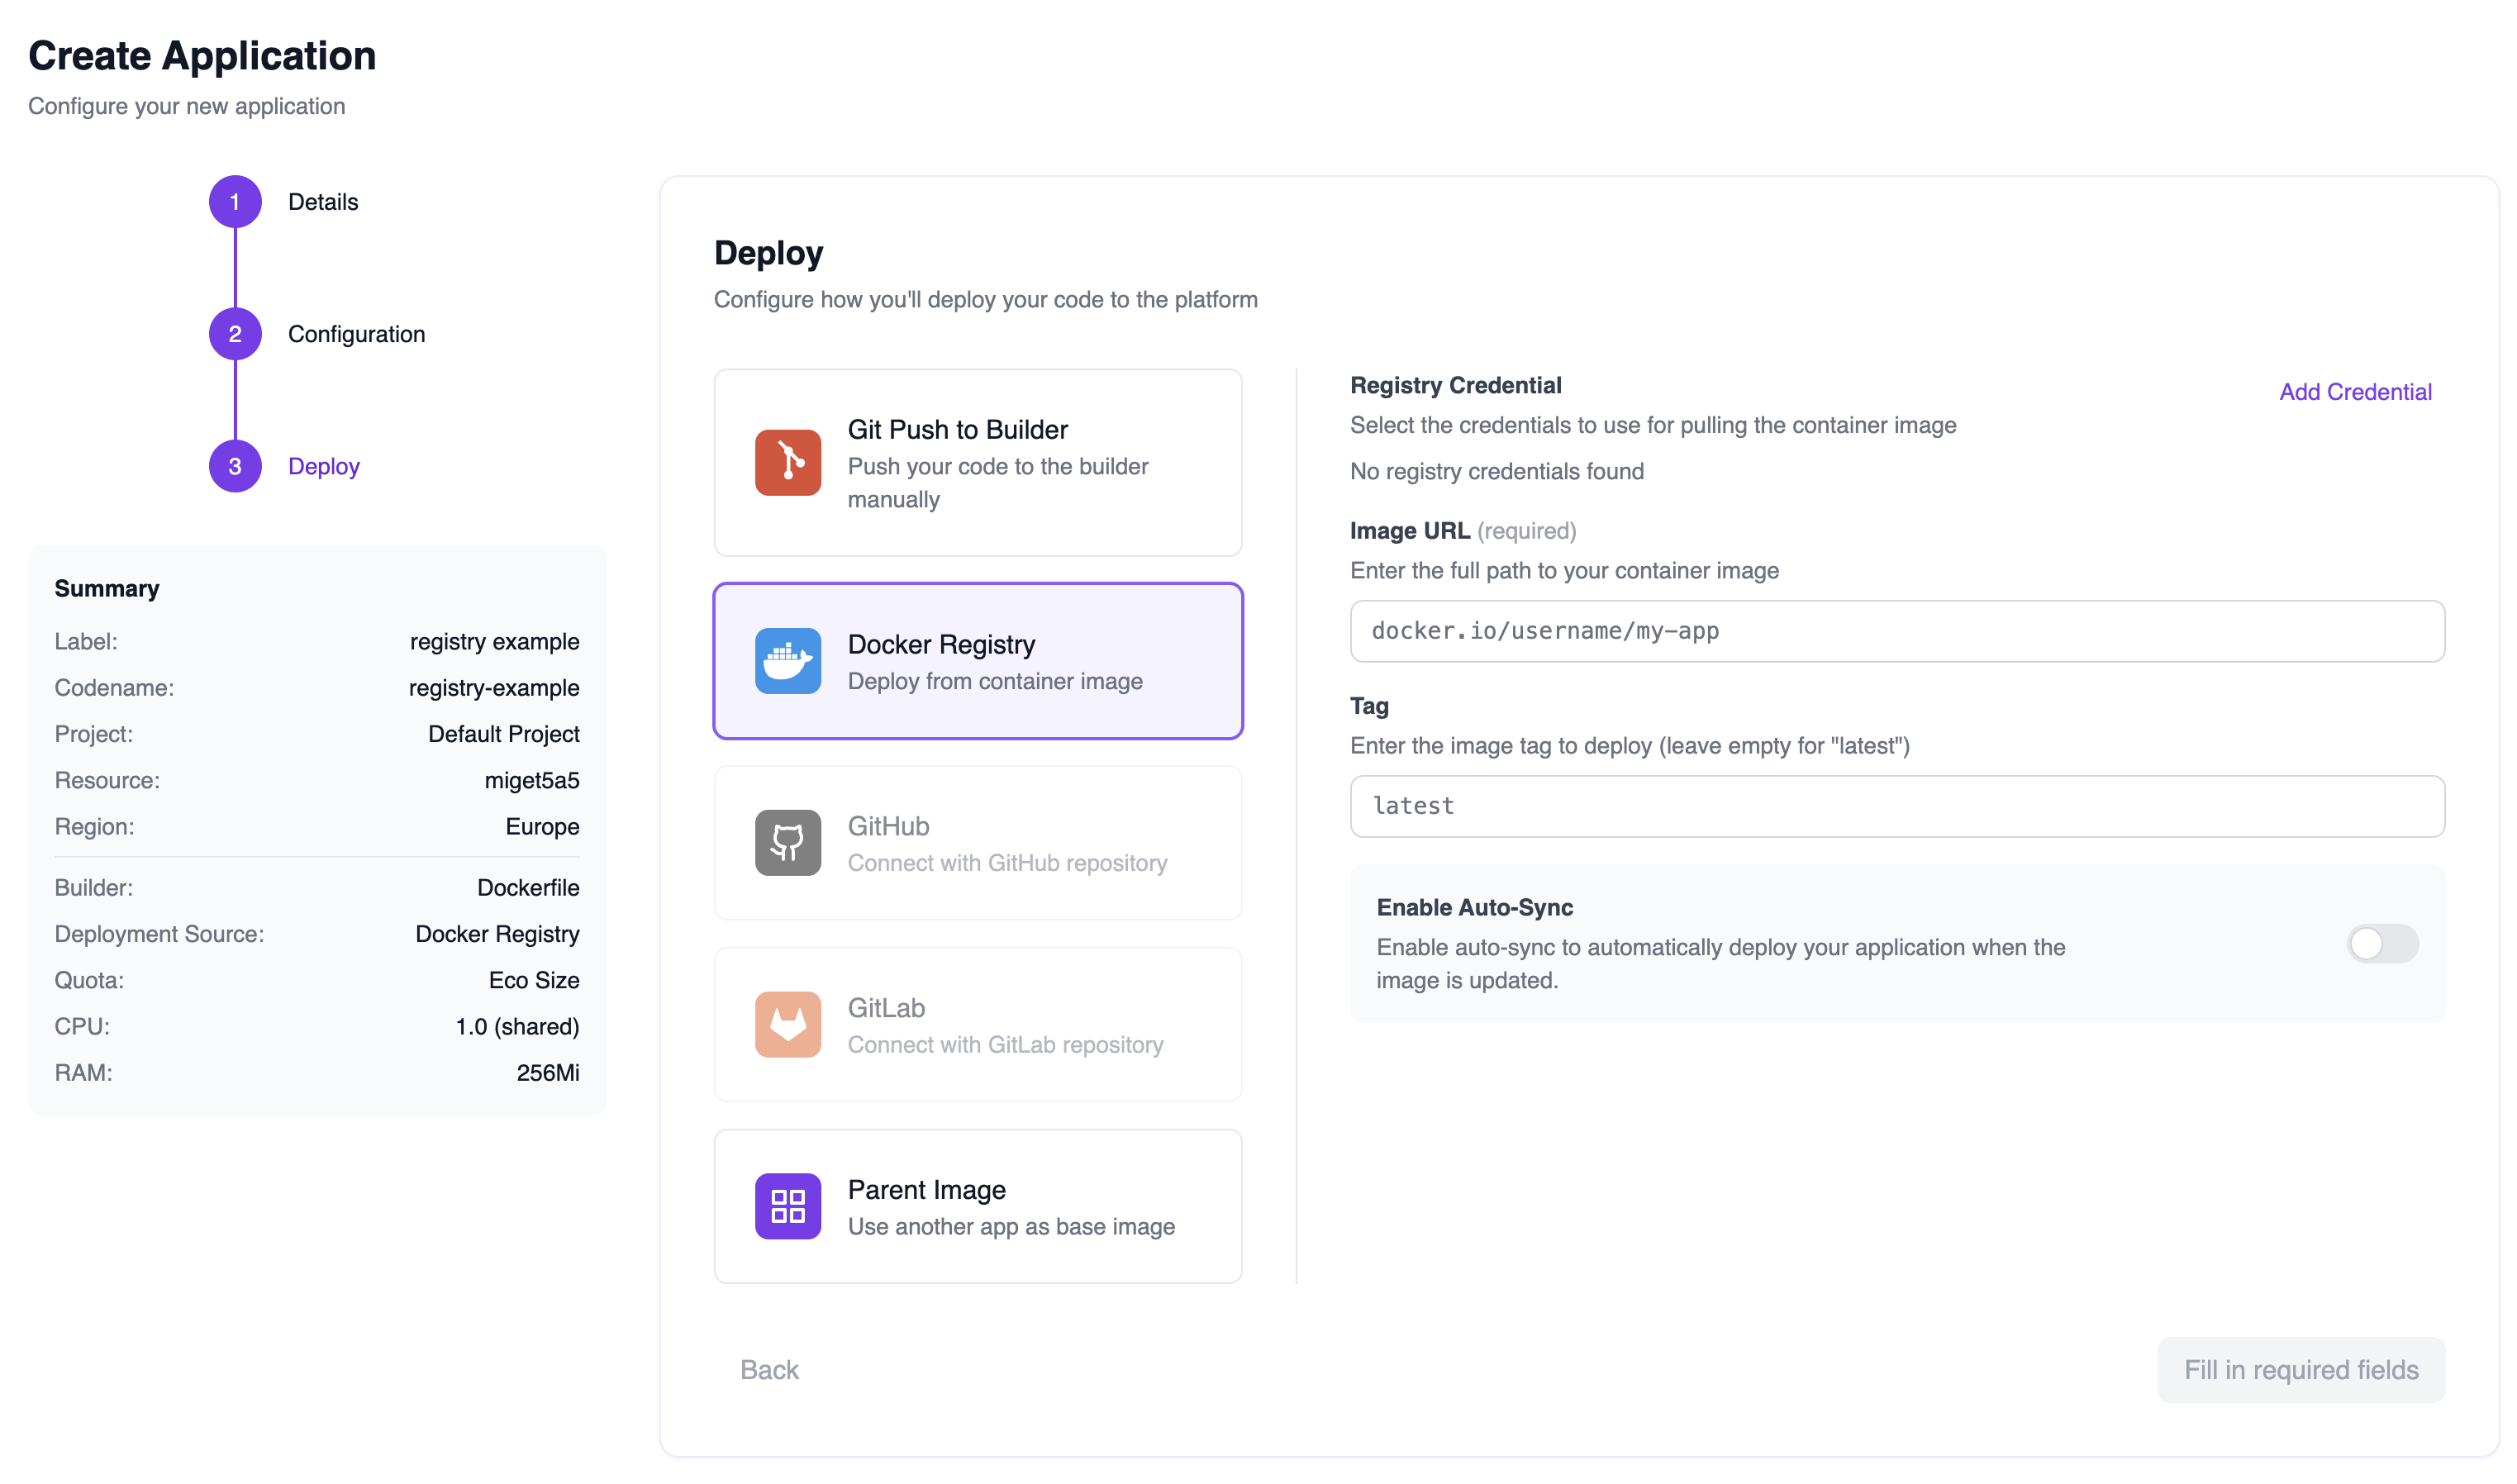
Creating a New App with Container Registry
When creating a new application, select Docker Registry as your deployment method:- Go through the app creation wizard (Details → Configuration → Deploy)
- On the Deploy step, select Docker Registry
- Configure your deployment:
- Registry Credential — Select a saved credential or leave empty for public images
- Image URL — Full path to your container image (e.g.,
docker.io/username/my-app) - Tag — Image tag to deploy (leave empty for
latest) - Enable Auto-Sync — Automatically redeploy when the image is updated
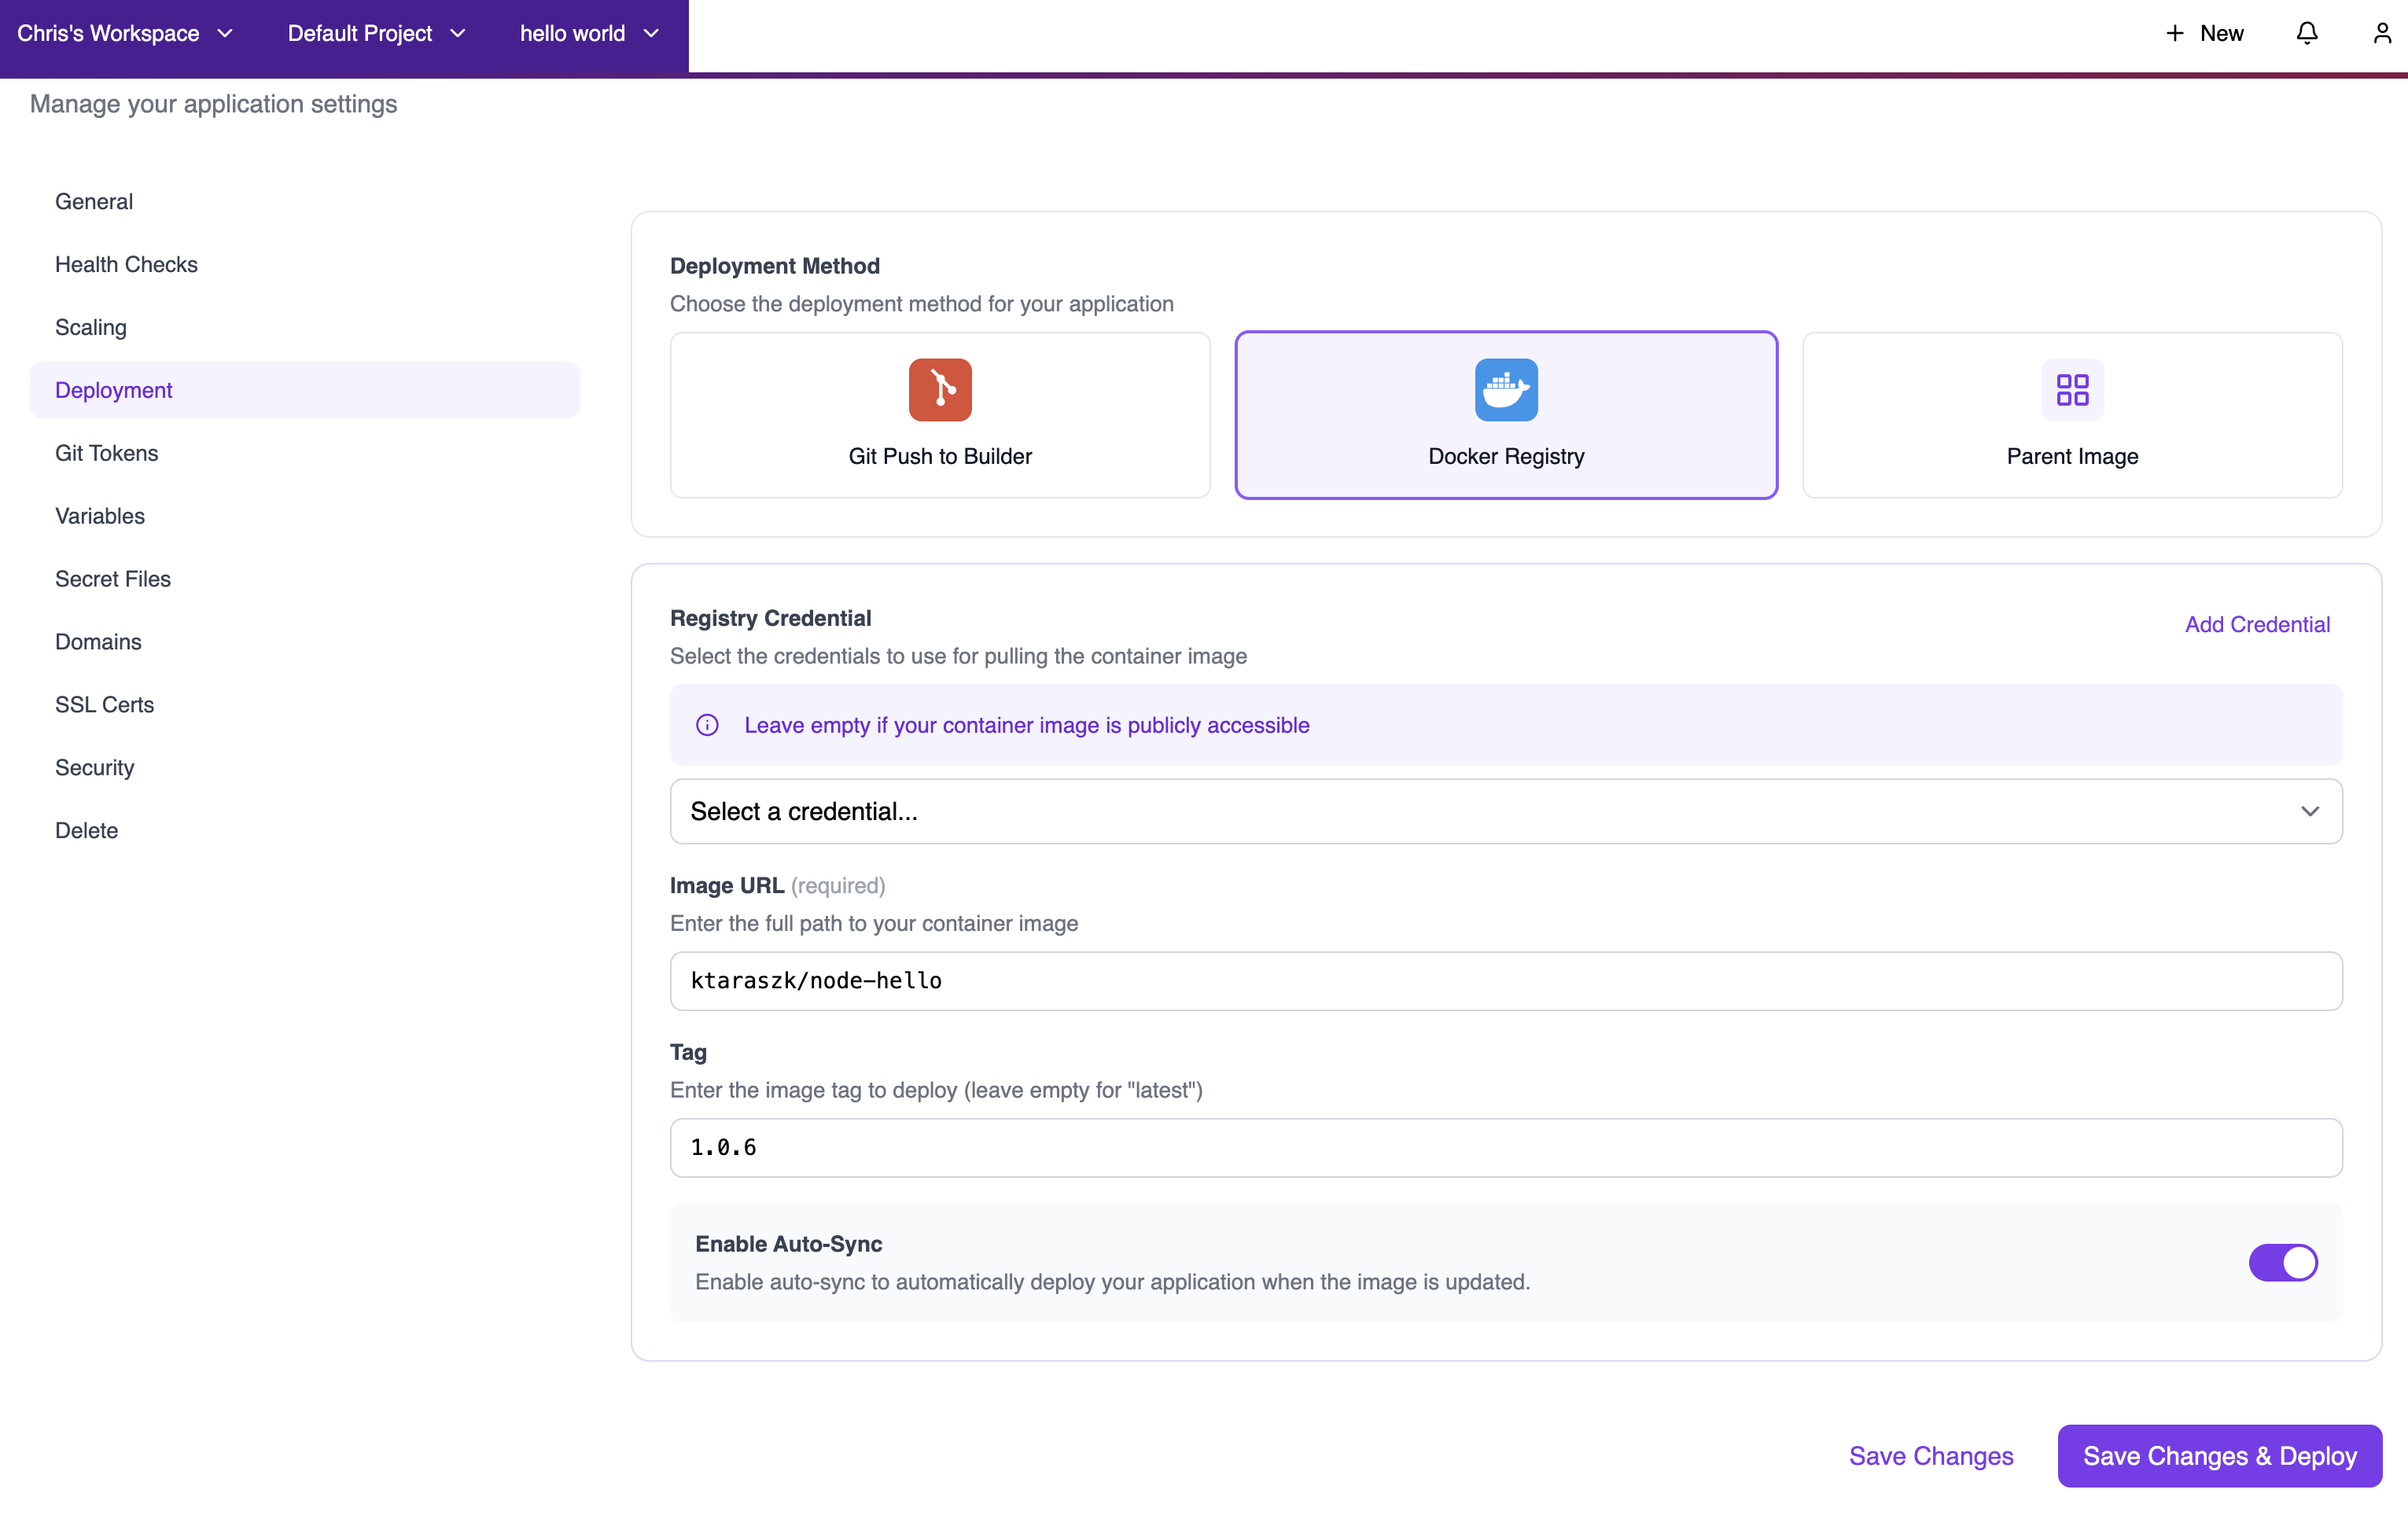
Switching an Existing App to Container Registry
You can change the deployment method of any existing application:- Go to your application’s Settings → Deployment
- Select Docker Registry as the deployment method
- Configure the registry settings:
- Select or add a registry credential
- Enter the image URL and tag
- Optionally enable Auto-Sync
- Click Save Changes or Save Changes & Deploy
Deploying and Redeploying
Manual Deployment
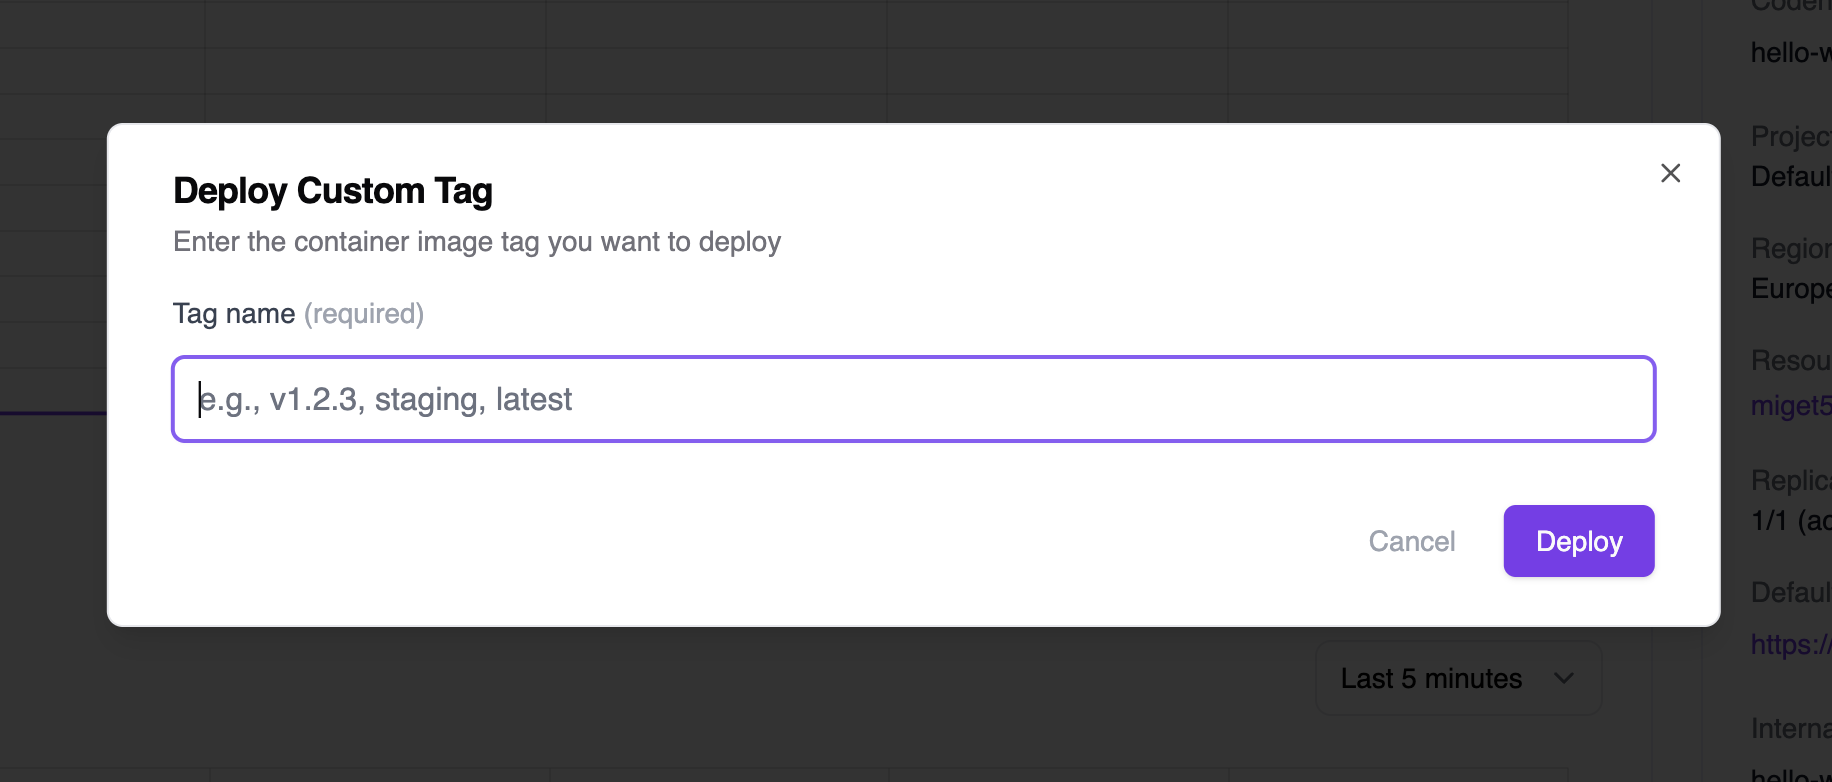
Once configured, use the Deploy button dropdown to:- Deploy current tag — Redeploy the currently configured image tag (e.g.,
Deploy 1.0.6 tag) - Deploy custom tag — Deploy a different tag that you’ve pushed to your registry

Auto-Sync (Automatic Deployments)
Enable Auto-Sync to automatically redeploy your application whenever the image is updated in the registry. When Auto-Sync is enabled:- Miget checks for image updates every 1 minute
- If a new image digest is detected for the configured tag, Miget automatically triggers a deployment
- The current tag version is displayed in the application header (e.g.,
ktaraszk/node-hello:1.0.6) - The app shows Auto-Deploy badge indicating automatic deployments are active
Image URL Format
The image URL format depends on your registry:| Registry | Image URL Format |
|---|---|
| Docker Hub | username/image or docker.io/username/image |
| GitHub Container Registry | ghcr.io/username/image |
| GitLab Container Registry | registry.gitlab.com/group/project/image |
| AWS ECR | 123456789.dkr.ecr.region.amazonaws.com/image |
| Azure Container Registry | myregistry.azurecr.io/image |
| DigitalOcean | registry.digitalocean.com/registry/image |
| Quay.io | quay.io/username/image |
Best Practices
-
Use specific tags — Avoid using
latestin production. Use semantic versioning (e.g.,1.0.6) or commit SHAs for traceability. - Secure your credentials — Use read-only tokens and rotate them regularly.
- Test images locally — Verify your container runs correctly before pushing to the registry.
- Use Auto-Sync for staging — Enable Auto-Sync for staging environments to automatically deploy the latest changes. Use manual deployments for production.
- Monitor deployments — Check the application logs and health checks after each deployment to ensure the new image is running correctly.