main branch. The process is fully automated using a GitHub Actions workflow defined in a YAML file.
Prerequisites
Before you begin, ensure you have the following:- Miget Repository: You should have a Miget repository set up where you want to deploy your code. You can find the Miget repository for your App under Deploy tab at app.miget.com.
- GitHub Repository: The source code that you want to deploy should be hosted on GitHub.
- Miget Token: A Miget access token that can be used to authenticate and push changes to your Miget repository. This token should be stored as a secret in your GitHub repository.
Get Miget Token
Navigate to Settings tab, and click Git Tokens Next, you will see an Information box with a deploy commands.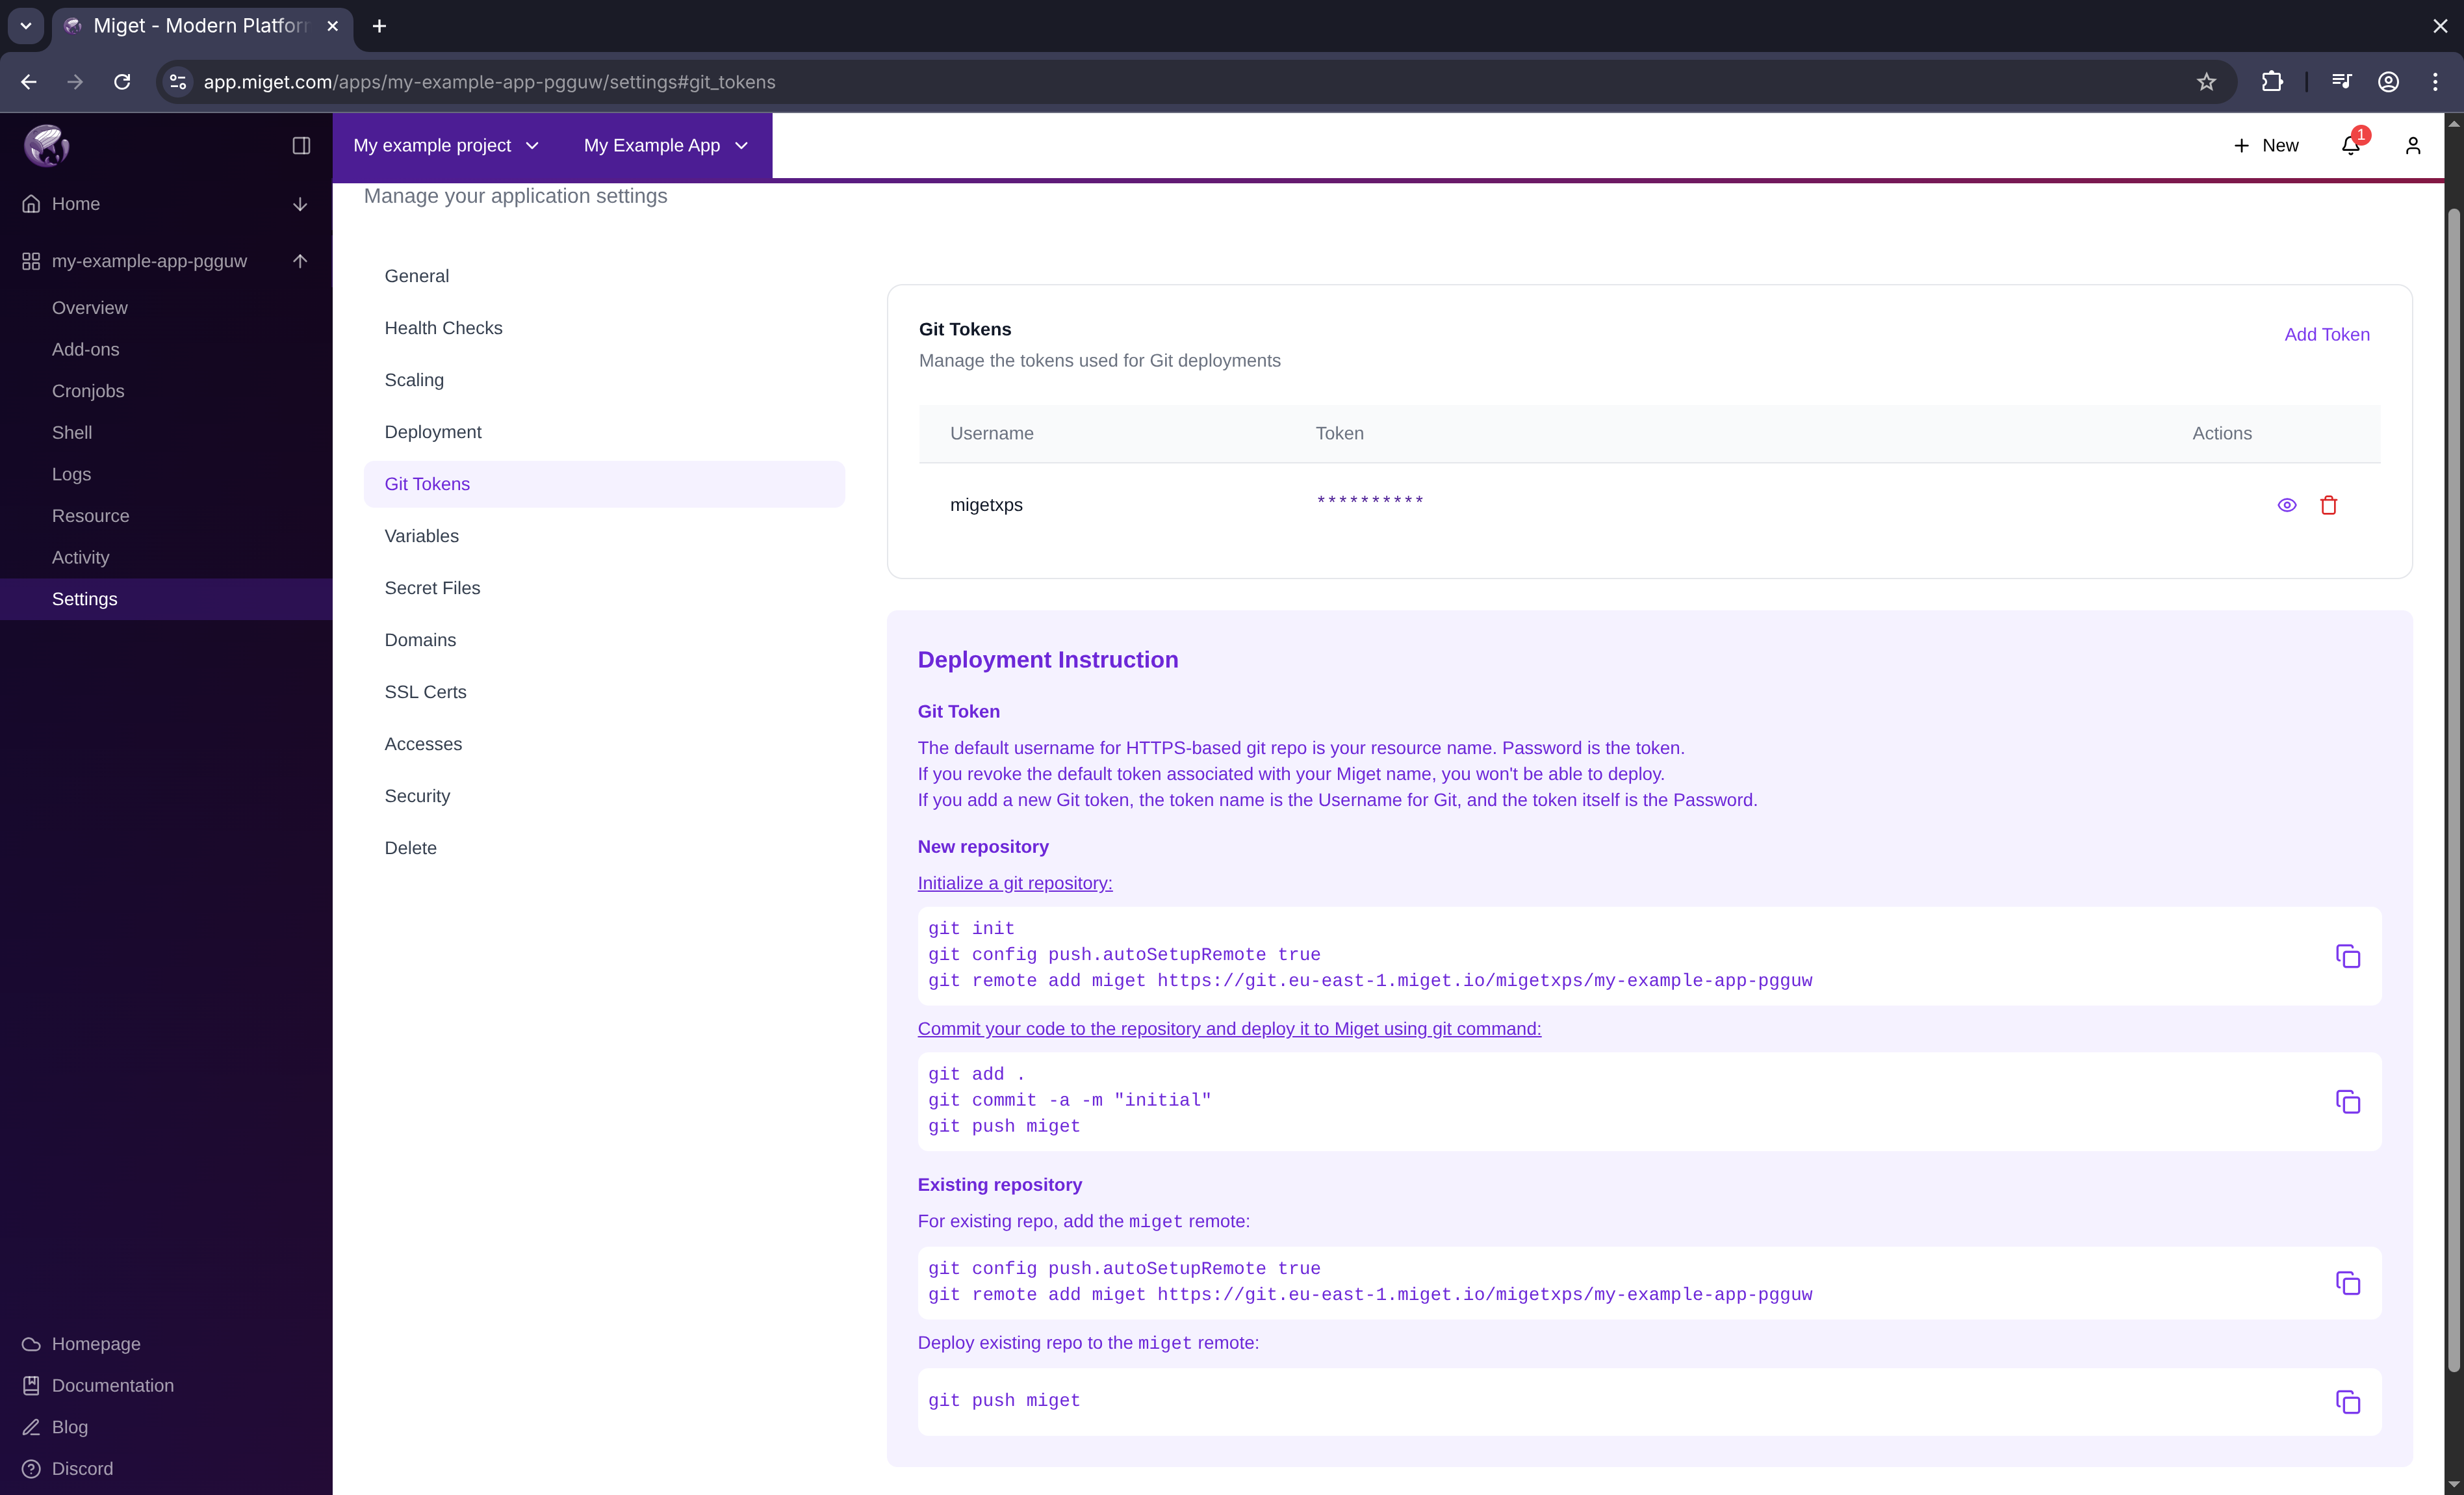
- The default username for the HTTPS-based git repo is your Miget name.
- The password is the token.
- If you revoke the default token associated with your Miget name, you won’t be able to deploy.
- If you add a new Git token, the token name is the Username for Git, and the token itself is the Password.
Add Miget Token to Github
Navigate to your GitHub repository and go the Settings Page. Under Secrets and variables please click on Actions
MIGET_TOKEN_KEY.
Save the secret. This will securely store the Miget token, which can be referenced in your workflow file.

Create the GitHub Actions Workflow File
First, you’ll need to create a YAML file in your GitHub repository to define the workflow for deployment. You can place this file under.github/workflows/deploy-to-miget.yaml in your repository.
Remember to replace code in brackets with your values!
Deploying to Miget
Once the workflow file is in place, any time you push code to themain branch, GitHub Actions will automatically trigger the deployment process to Miget.
After pushing to the main branch, you can monitor the deployment process by going to the Actions tab in your GitHub repository. Here, you can view the status of your workflow and see logs for each step.